



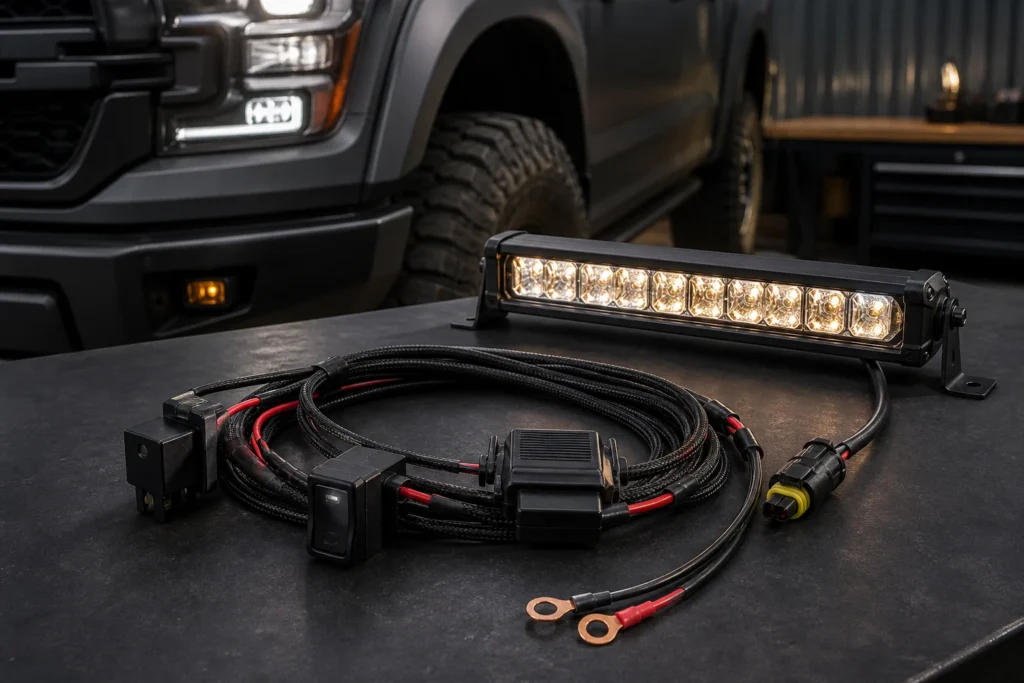
Un arnés de cableado para barra de luces es un circuito dedicado de bajo voltaje que conecta la batería del vehículo, el fusible, el relé, el interruptor o disparador, la tierra y la barra de luces LED. Su función es mantener la ruta de alta corriente de la lámpara protegida y separada del pequeño circuito del interruptor del tablero; no hace que un cable, fusible, conector o ruta de montaje de tamaño incorrecto sean seguros por sí solo.
La pregunta práctica de compra no es simplemente si un kit incluye un relé. Verifique la corriente medida de la barra de luces, el voltaje del sistema, la longitud total del cable de ida y vuelta, la clasificación del portafusibles, la clasificación de contacto del relé, el sellado del conector, la calidad del engarzado y el método de disparo como un solo sistema. La guía relacionada sobre barras de luz LED todoterreno ayuda con la elección de la lámpara y el montaje; esta guía se centra en la ruta eléctrica que hace utilizable la lámpara.
Tabla de contenido
- ¿Qué es un arnés de cableado para barra de luces?
- ¿Qué partes se incluyen en un arnés de cableado para barra de luces?
- ¿Cómo funciona un arnés de cableado con relé?
- ¿Qué significan los terminales del relé 30, 85, 86, 87 y 87a?
- ¿Qué tipo de arnés de cableado para barra de luces debería elegir?
- ¿Cómo elegir el calibre de cable, fusible y relé correctos?
- ¿Cómo instalar un arnés de cableado para barra de luces de forma segura?
- ¿Cómo solucionar problemas de un arnés de cableado para barra de luces?
- ¿Qué deben verificar los compradores antes de adquirir kits de arnés para barra de luces?
- Conclusión: Trate el arnés como parte del sistema de iluminación
- Preguntas frecuentes
- Referencias
¿Qué es un arnés de cableado para barra de luces?
Un arnés de cableado para barra de luces es la ruta preorganizada que alimenta y controla una barra de luces LED auxiliar. Los conductores más gruesos del lado de la batería transportan la carga de la lámpara; el cableado de control más ligero opera el relé o el disparador aprobado del vehículo.
Combínelo con la corriente, el voltaje, el conector y la ruta de la lámpara, no con el número de cables o la apariencia de la caja del relé. Una barra de luces LED 3 en 1 puede agregar entradas de luz de carretera, ámbar o de posición, y DRL o de advertencia, cada una con su propio requisito de corriente, polaridad y disparo.
¿Qué partes se incluyen en un arnés de cableado para barra de luces?
Un arnés normalmente tiene siete partes funcionales. Los colores de los cables varían; use el diagrama suministrado y una prueba de continuidad.
| Parte | Qué hace | Qué verificar |
|---|---|---|
| Cable positivo de la batería | Transporta energía desde la fuente hasta el circuito protegido | Tamaño del conductor, aislamiento, engarzado del terminal y longitud |
| Portafusibles en línea | Interrumpe el circuito durante un evento de sobrecorriente | Tipo de fusible, clasificación del portafusibles, sellado y ubicación cerca de la fuente |
| Relé y zócalo | Permite que un disparador de baja corriente controle la carga de la lámpara | Clasificación de contacto, voltaje de la bobina, ajuste del zócalo, protección contra calor y humedad |
| Cable del interruptor o disparador | Activa la bobina del relé o una función separada de la lámpara | Polaridad, corriente de disparo, compatibilidad con el OEM y uso legal |
| Cable de tierra | Completa el circuito y limita la caída de voltaje en el lado de tierra | Punto de conexión limpio, seguridad del sujetador, protección contra la corrosión |
| Conector del lado de la lámpara | Une el arnés a la barra de luces | Clave de acoplamiento, retención del terminal, clasificación de corriente y estado sellado |
| Funda, pasacables y alivio de tensión | Protege los cables de la abrasión, el calor, el agua y el movimiento | Material, ubicación de temperatura, radio de curvatura y soporte de entrada del cable |
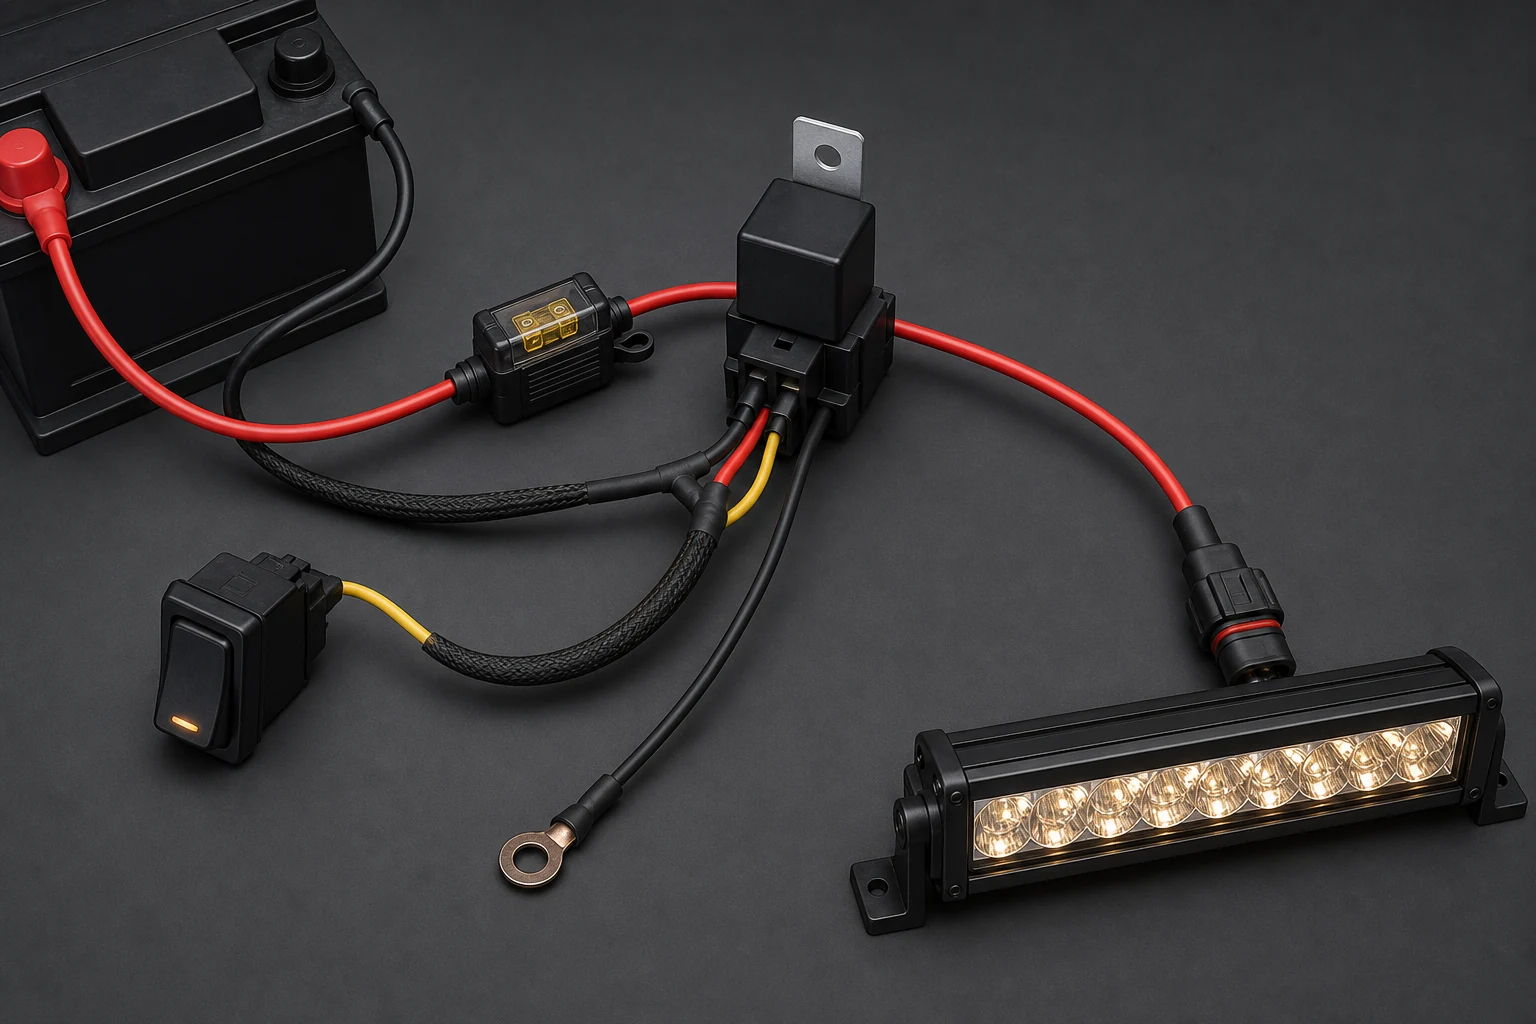
El fusible protege el conductor de un cortocircuito; no puede corregir una lámpara sobrecargada o un terminal flojo. Littelfuse identifica los fusibles automotrices como dispositivos de sobrecorriente y advierte que los cortocircuitos pueden exceder la capacidad del cable y del conector 3. Coordine el fusible, el cable, el relé y el conector.
Los conectores sellados son útiles en compartimentos del motor, pero la afirmación IP pertenece al conector exacto, los sellos, la entrada del cable y la condición de acoplamiento. La información DEUTSCH DT de TE Connectivity muestra por qué el contacto, el tamaño del cable y los detalles de sellado deben coincidir 5. Una carcasa sellada no puede compensar un engarzado deficiente.
¿Cómo funciona un arnés de cableado con relé?
Un arnés con relé utiliza un pequeño circuito de control para conmutar un circuito separado de alta corriente. El interruptor energiza la bobina del relé; los contactos luego conectan la energía fusionada de la batería a la barra de luces.
La distinción clave es corriente de control versus corriente de carga. El interruptor y el disparador llevan la corriente de la bobina, mientras que el cable de la batería, el fusible, los contactos del relé, la masa y el conector de la lámpara llevan la carga principal. Los disparadores del lado negativo, los relés protegidos con diodo, los relés de cinco patillas y los controladores requieren el diagrama suministrado. Nunca inferir la polaridad o la función de una terminal solo por el color del cable.
¿Qué significan los terminales del relé 30, 85, 86, 87 y 87a?
Para un relé automotriz común de cuatro patillas, la terminal 30 es la alimentación con fusible, la terminal 87 es la salida normalmente abierta hacia la barra de luces, y las terminales 85 y 86 son las conexiones de la bobina. Un relé de cinco patillas puede añadir la 87a como contacto normalmente cerrado; no debe usarse como salida de la lámpara a menos que el circuito esté diseñado intencionalmente para ese comportamiento.
| Terminal | Función común | Verificar antes de conectar |
|---|---|---|
| 30 | Entrada de contacto del lado de la batería, normalmente después del fusible | Confirmar que el fusible esté aguas arriba y que la terminal esté clasificada para la carga |
| 87 | Salida de contacto normalmente abierta hacia la lámpara | Confirmar que se energice solo cuando el relé esté activado |
| 85 | Retorno de la bobina del relé | Verificar si el relé tiene un diodo o resistor de supresión |
| 86 | Disparador de la bobina del relé | Confirmar que el interruptor o el disparador del vehículo suministre la polaridad requerida |
| 87a | Contacto normalmente cerrado en algunos relés de cinco patillas | Dejar sin usar a menos que el circuito requiera específicamente una ruta de conmutación |
Si el relé tiene un diodo interno, invertir 85 y 86 puede impedir que funcione o dañar el circuito de control. El cuerpo del relé, el diagrama del proveedor o el banco de pruebas deben identificar ese detalle. Un buen kit de arnés incluye un diagrama que coincide con el relé y el zócalo reales suministrados, no un pinout genérico copiado de otro modelo.
¿Qué tipo de arnés de cableado para barra de luces debería elegir?
Elegir el arnés por corriente, voltaje, salidas, familia de conectores, método de disparo, longitud del cable y entorno. Un pod pequeño de 12V, una barra de techo larga, una configuración de doble lámpara y un vehículo de trabajo de 24V necesitan verificaciones diferentes.
La selección del haz también afecta la carga de la lámpara y el plan de montaje; comparar patrones de haz de barras de luz LED spot, flood y combo antes de finalizar el arnés.
| Tipo de arnés | Mejor opción | Ventaja principal | Riesgo principal |
|---|---|---|---|
| Arnés de salida única | Una barra de luces o una carga emparejada | Circuito simple y diagnóstico fácil | Debe coincidir con la corriente completa de la lámpara |
| Arnés de doble salida | Dos pods o dos barras pequeñas | Una instalación organizada | El fusible y el relé compartidos pueden ser de capacidad insuficiente |
| Arnés de alta corriente | Barra grande o múltiples lámparas | Conductores más gruesos y protección más robusta | Más calor, conectores más grandes y mayores exigencias de ruteo |
| Arnés para panel de interruptores | Varios accesorios controlados por separado | Ruta de expansión más clara | Se requieren más cables de disparo y disciplina de etiquetado |
| Arnés específico para vehículo | Interruptor estilo OEM o ruteo específico del modelo | Ajuste más limpio y menos cables sueltos | Menos flexible entre plataformas de vehículos |
Para una entrada de DRL, ámbar o luz de posición, usar una derivación documentada en lugar de asumir que la salida del relé principal alimenta todas las funciones. La guía para cableado del modo DRL de la barra de luces cubre este circuito de acento de menor corriente.
La elección del conector depende del entorno. Una afirmación de "impermeable" puede requerir las terminales correctas, sellos traseros, bloqueo de cuña y la mitad de acoplamiento. La guía sobre clasificaciones IP para luces LED y conectores explica por qué una clasificación de gabinete no es una clasificación completa del arnés.
¿Cómo elegir el calibre de cable, fusible y relé correctos?
Comenzar con la corriente medida o especificada, luego verificar la ampacidad, la longitud del cable de ida y vuelta, la caída de voltaje, la temperatura, la clasificación del conector y la coordinación del fusible. La corriente medida y la hoja de datos deben superar una afirmación de vataje de un mercado en línea.
La tabla es un ejemplo ilustrativo de planificación, no es una prescripción universal. Asume 13,8 V, conductores de cobre, un objetivo de caída de tensión de 3% y la longitud de ida y vuelta indicada. El calor, la construcción SAE frente a AWG, el aislamiento, los terminales y las normas locales pueden requerir un conductor de mayor sección.
| Carga de barra de luces | Corriente aproximada a 13,8 V | Longitud de ida y vuelta de ejemplo | Verificación inicial del conductor | Punto de control del fusible | Punto de control del relé |
|---|---|---|---|---|---|
| 60W | 4,3 A | 15 pies / 4,6 m | Aproximadamente AWG 14 o mayor después de las verificaciones de caída de tensión y ampacidad | A menudo 7,5-10 A, solo si los datos del cable y de la lámpara lo respaldan | Capacidad de contacto de 15-20 A o superior |
| 120W | 8,7 A | 15 pies / 4,6 m | Aproximadamente AWG 10-12 según la construcción y la reducción de capacidad | A menudo 10-15 A, adaptado al cable y a la lámpara | Capacidad de contacto de 20-30 A o superior |
| 240 W | 17,4 A | 20 pies / 6,1 m | Aproximadamente AWG 6-8 después del cálculo | A menudo 20-25 A, nunca por encima del límite del conductor protegido | Capacidad de contacto de 30-40 A o superior |
| 480 W | 34,8 A | 20 pies / 6,1 m | Aproximadamente AWG 4-6 después del cálculo | A menudo 40-50 A solo si todo el circuito lo soporta | Capacidad de contacto de 50-60 A o un diseño de alta corriente hecho a propósito |
Use la corriente de carga y ida y vuelta longitud en Blue Sea Systems Circuit Wizard, luego verifique la ampacidad del conductor y las condiciones del compartimiento del motor 4. El cable debe satisfacer tanto la capacidad de corriente como la caída de tensión.
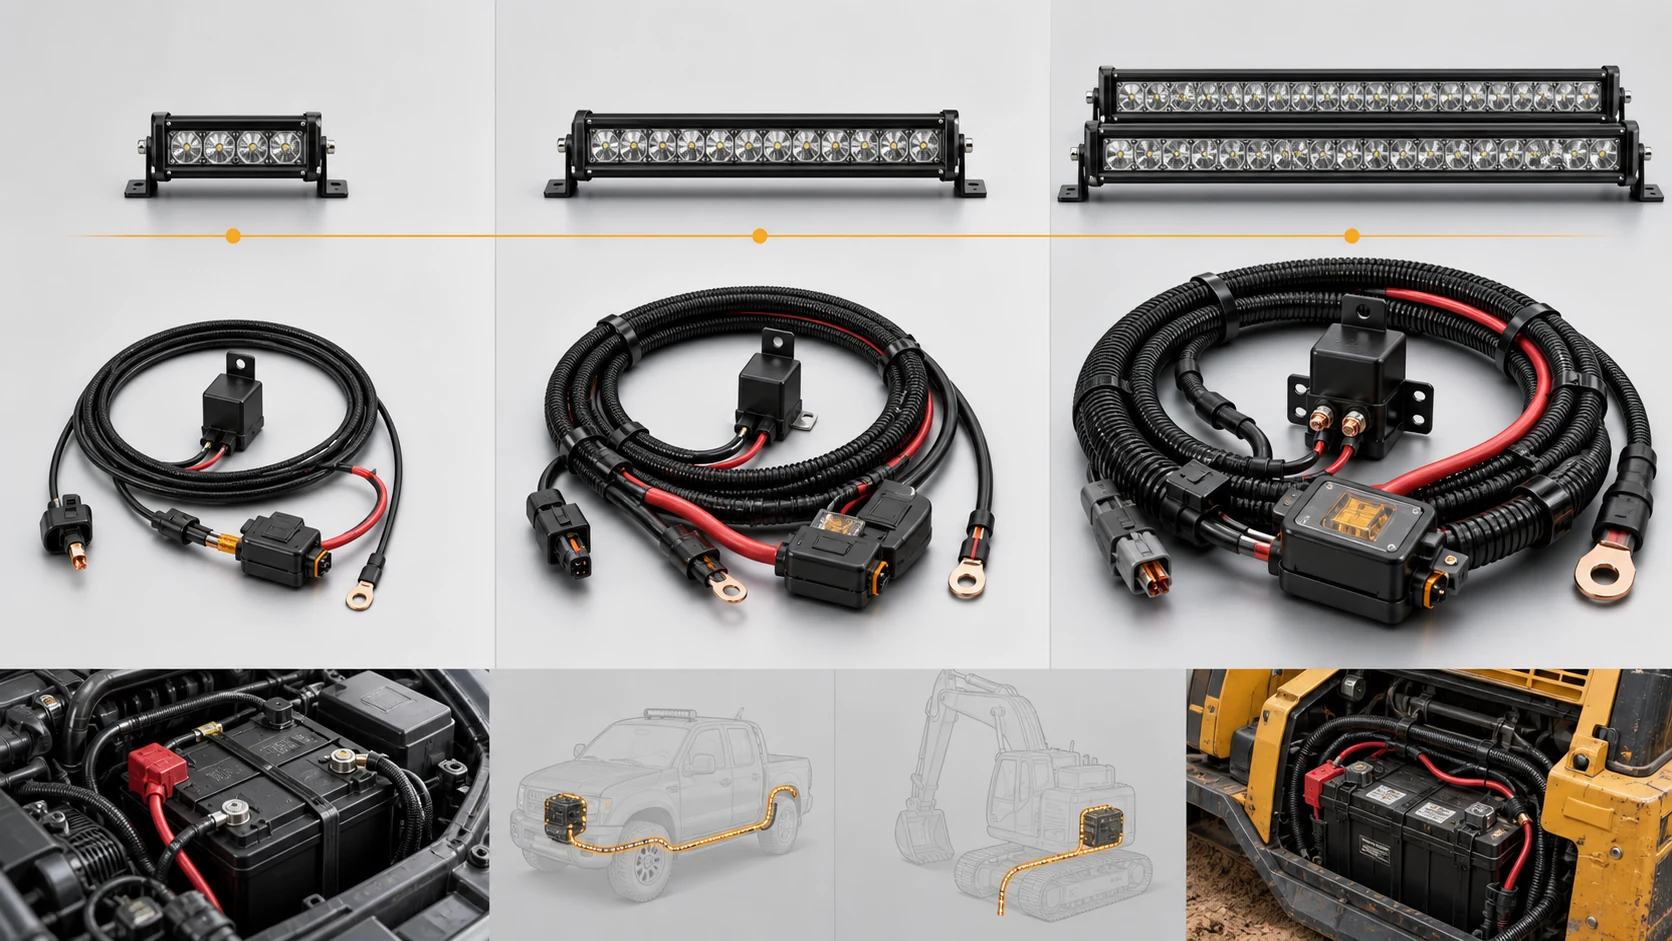
Coloque el fusible cerca de la fuente positiva. Debe proteger el conductor más pequeño y mantenerse dentro de las capacidades del portafusible, los terminales, el relé y la lámpara. La apertura repetida del fusible es una señal de diagnóstico, no una razón para instalar un fusible más grande.
¿Cómo instalar un arnés de cableado para barra de luces de forma segura?
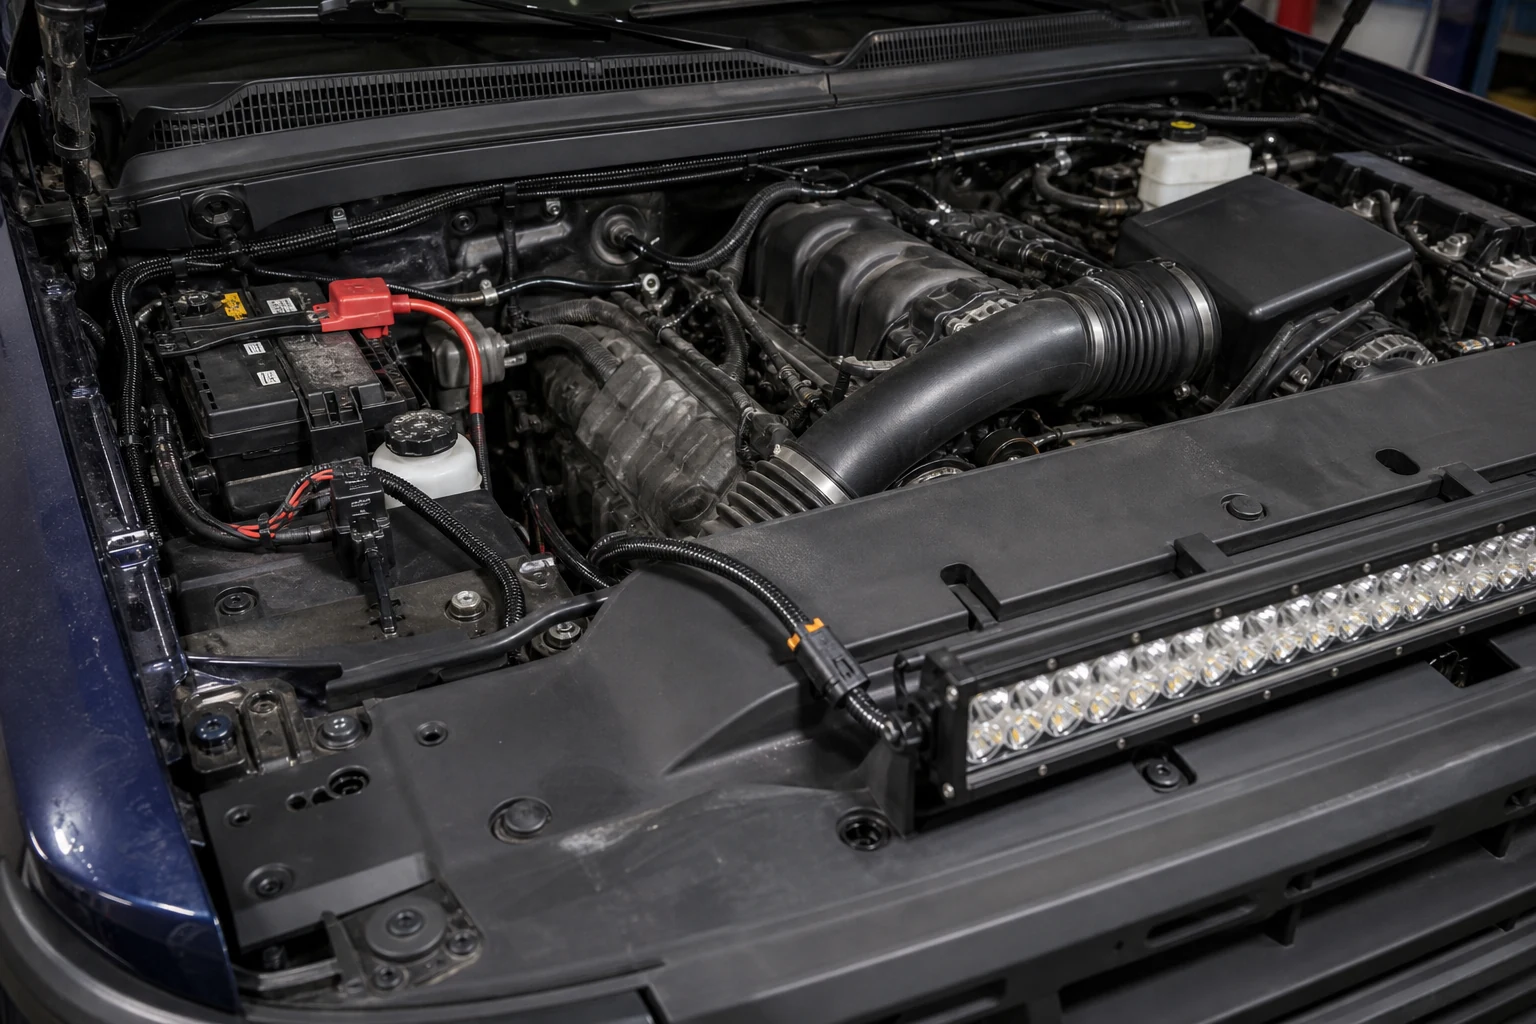
Instale con la batería desconectada, la ruta planificada, el fusible cerca de la fuente y cada cable protegido contra calor, abrasión, agua y movimiento. Pruebe el circuito terminado bajo carga antes de volver a colocar los embellecedores.
- Confirme la especificación. Registre la tensión, la corriente, el conector, las entradas de activación y si el vehículo es de 12 V o 24 V.
- Planifique la ruta. Evite escapes, correas, ventiladores, piezas de dirección, bisagras, soportes afilados y puntos de pinzamiento. Use un pasacables en cada pasada.
- Instale la protección. Coloque el fusible cerca de la fuente positiva y monte el relé lejos del calor no controlado y del agua.
- Haga que la masa sea confiable. Use una ruta de retorno limpia y segura y proteja la conexión terminada contra la corrosión.
- Asegure el cable. Agregue funda, clips, alivio de tensión y holgura de servicio. No deje que el conector soporte la tensión del cable.
- Verifique la activación. Las entradas de luz alta, encendido, reversa o iluminación de fábrica pueden tener límites legales o del control de carrocería. Use la interfaz especificada cuando sea necesario.
- Pruebe bajo carga. Verifique la tensión de la lámpara, la corriente, las temperaturas, la caída de masa y el parpadeo después de que el sistema alcance la temperatura normal.
Para uso en vías públicas, una barra de luces auxiliar no reemplaza los faros requeridos. Las normas de EE. UU. para vehículos comerciales abordan las luces auxiliares, el montaje y la orientación 2; local rules vary.
¿Cómo solucionar problemas de un arnés de cableado para barra de luces?
Troubleshoot from source to load: battery, fuse, relay trigger, relay output, ground, connector, then lamp. This is faster than replacing parts at random.
| Symptom | First checks | Likely cause or next action |
|---|---|---|
| No light and no relay click | Battery voltage, fuse continuity, trigger voltage, coil ground | Open fuse, missing trigger, wrong coil polarity, or poor ground |
| Relay clicks but lamp stays off | Voltage at terminal 87, lamp ground, connector pin fit | Open contact, loose crimp, reversed pin, or lamp-side ground fault |
| Fuse opens immediately | Disconnect lamp, inspect positive cable and connector | Short to ground, crushed cable, water bridge, or wrong fuse size |
| Light flickers or dims on a long run | Measure voltage at battery and lamp while operating | Undersized conductor, loose ground, high contact resistance, or low battery voltage |
| Connector or fuse holder gets hot | Check current, terminal tension, crimp and contact surfaces | Overload, undersized connector, poor crimp, or oxidized contact |
| Works dry but fails after rain or washing | Inspect rear seal, mating lock, cable entry, and corrosion | Connector is not sealed in its installed condition or water is entering the loom |
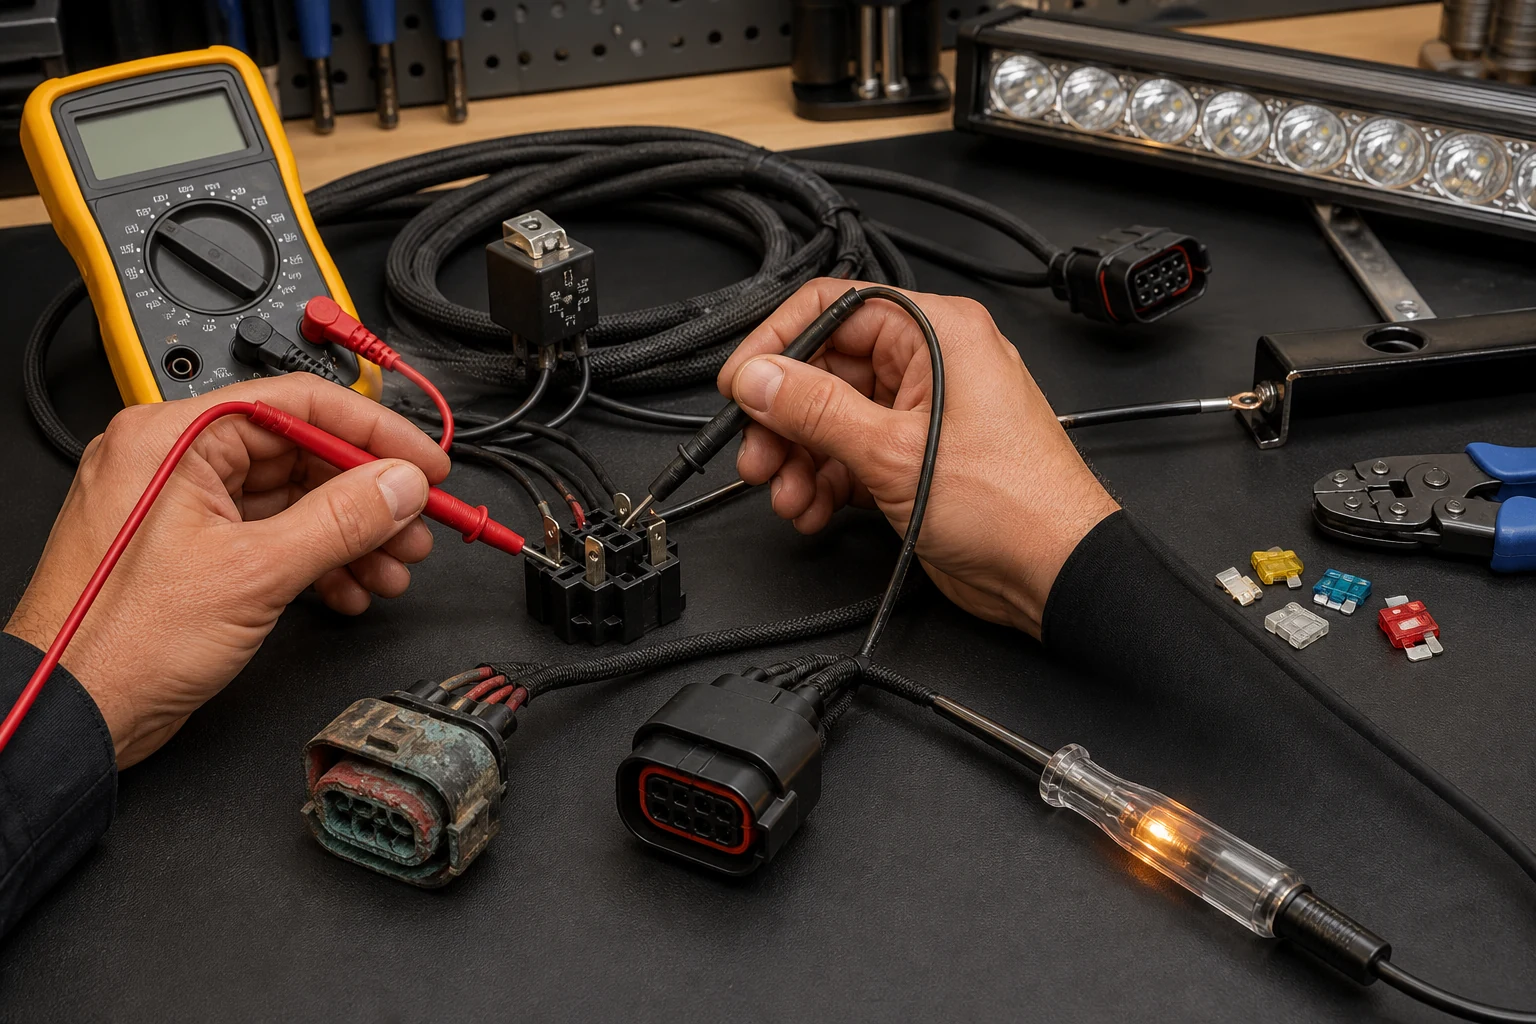
Continuity alone does not prove a high-current connection is healthy. A weak crimp can pass a no-load test but create voltage drop or heat under load, so measure voltage while operating and inspect the terminal mechanically.
¿Qué deben verificar los compradores antes de adquirir kits de arnés para barra de luces?
Before approving a harness kit, request a model-specific bill of materials and sample test record linking the lamp rating to the exact wire, fuse holder, relay, connector, switch, length, and vehicle voltage.
- Electrical scope: rated voltage, measured current, continuous current, outputs, and triggers.
- Protection: fuse type and location, holder rating, relay part number, contact rating, coil suppression, and short-circuit test.
- Conductors: wire construction, AWG or mm2 size, insulation temperature, total length, and loaded voltage drop.
- Connectors: mating part number, terminal size, seal, crimp tooling, retention test, and mated-state IP boundary.
- Installation: grommets, loom, clips, strain relief, bend radius, heat clearance, labeling, and matching diagram.
- Quality: pull-test records, terminal inspection, load and thermal tests, packaging, batch traceability, and revision control.
Align the harness with the automotive LED light bar product range instead of one generic kit for every bar. Compare the delivered bundle, label, connector, length, and test evidence—not just the quotation artwork.
Conclusión: Trate el arnés como parte del sistema de iluminación
Treat the harness as a protected low-voltage system: verify the load, calculate round-trip cable needs, protect the smallest conductor, confirm relay and connector ratings, route away from heat and abrasion, then test under load.
Preguntas frecuentes
Do you need a relay for an LED light bar?
Most medium and large LED light bars should use a fused relay harness so the switch carries control current. Small lamps may differ; follow the manual and measured load.
What fuse size does a 120W light bar need?
At 13.8V, 120W is about 8.7A before losses. A 10-15A fuse is only a starting checkpoint; it must protect the conductor and match every component rating.
Can a 12V light bar wiring harness be used on a 24V vehicle?
Only when the light bar, relay coil, switch, fuse holder, connector, and other components are 24V-rated. A 12V relay can fail even with heavy cable.
What do terminals 30 and 87 do on a relay?
On a common relay, 30 is the fused input and 87 the normally open output. Verify the diagram because five-pin and diode-protected relays differ.
Why does my light bar fuse keep blowing?
Check for a shorted lead, crushed loom, water, damaged lamp, undersized holder, or excessive load. Do not fit a larger fuse first.
Are DT connectors waterproof for light bar wiring?
Some DEUTSCH DT families are environmentally sealed, but the rating depends on the part, terminals, seals, cable size, and mated condition. The name alone does not prove the whole harness is waterproof.
Referencias
[1] National Highway Traffic Safety Administration. (2019). FMVSS No. 108 interpretation on supplemental lighting.
[2] Electronic Code of Federal Regulations. (2026). 49 CFR 393.24, Requirements for head lamps, auxiliary driving lamps and front fog lamps.
[3] Littelfuse. (2020). Automotive Electronics Applications Guide.
[4] Blue Sea Systems. Circuit Wizard for DC wire size and circuit protection planning.
[5] TE Connectivity. DEUTSCH DT sealed automotive connectors.