



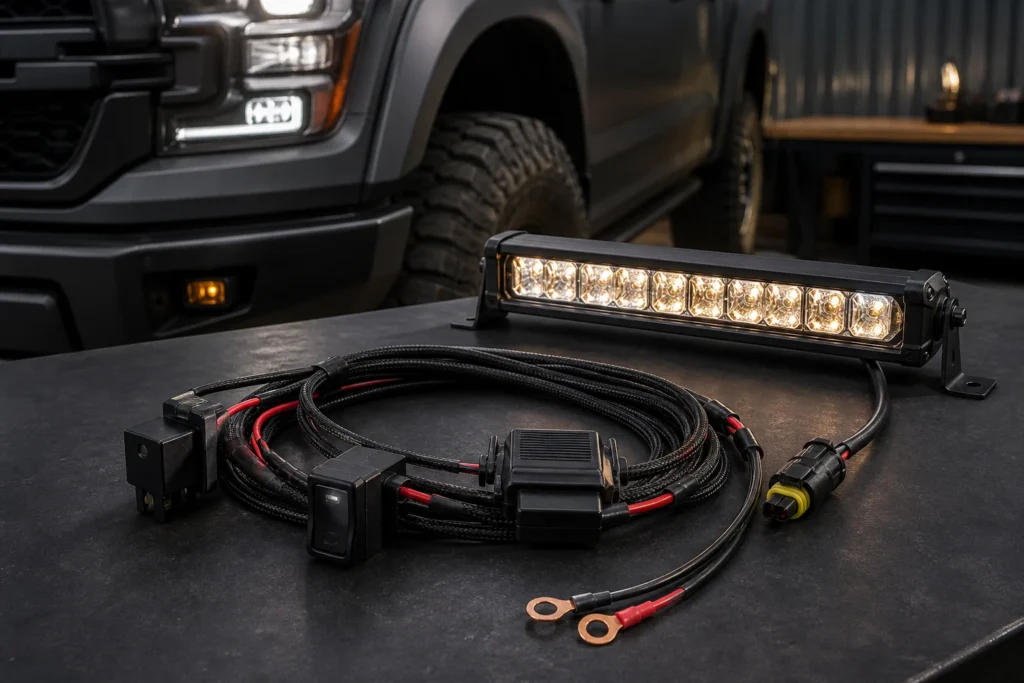
Um chicote de fiação para barra de luz é um circuito dedicado de baixa tensão que conecta a bateria do veículo, fusível, relé, interruptor ou gatilho, terra e barra de luz LED. Sua função é manter o caminho de alta corrente da lâmpada protegido e separado do pequeno circuito do interruptor do painel; ele não torna seguro, por si só, um fio, fusível, conector ou rota de montagem com dimensionamento incorreto.
A questão prática de compra não é simplesmente se um kit inclui um relé. Verifique a corrente medida da barra de luz, a tensão do sistema, o comprimento total do cabo de ida e volta, a classificação do porta-fusível, a classificação do contato do relé, a vedação do conector, a qualidade do crimp e o método de gatilho como um sistema. O guia relacionado para barras de luz LED off-road ajuda com a escolha da lâmpada e da montagem; este guia foca no caminho elétrico que torna a lâmpada utilizável.
Índice
- O que é um chicote de fiação para barra de luz?
- Quais peças estão incluídas em um chicote de fiação para barra de luz?
- Como funciona um chicote de fiação com relé?
- O que significam os terminais de relé 30, 85, 86, 87 e 87a?
- Qual tipo de chicote de fiação para barra de luz você deve escolher?
- Como você escolhe o bitola de fio, fusível e relé corretos?
- Como você instala um chicote de fiação para barra de luz com segurança?
- Como você soluciona problemas em um chicote de fiação para barra de luz?
- O que os compradores devem verificar antes de adquirir kits de chicote para barra de luz?
- Conclusão: Trate o chicote como parte do sistema de iluminação
- Perguntas Frequentes
- Referências
O que é um chicote de fiação para barra de luz?
Um chicote de fiação para barra de luz é o caminho pré-organizado que alimenta e controla uma barra de luz LED auxiliar. Condutores mais pesados do lado da bateria carregam a carga da lâmpada; a fiação de controle mais leve opera o relé ou o gatilho aprovado do veículo.
Combine-o com a corrente, tensão, conector e rota da lâmpada — não com a contagem de fios ou a aparência da caixa de relé. Um Barra de luz LED 3 em 1 pode adicionar entradas de farol alto, âmbar ou marcador, e DRL ou aviso, cada uma com seu próprio requisito de corrente, polaridade e gatilho.
Quais peças estão incluídas em um chicote de fiação para barra de luz?
Um chicote normalmente tem sete partes funcionais. As cores dos fios variam; use o diagrama fornecido e uma verificação de continuidade.
| Parte | O que ela faz | O que verificar |
|---|---|---|
| Cabo positivo da bateria | Transporta energia da fonte para o circuito protegido | Tamanho do condutor, isolamento, crimp do terminal e comprimento |
| Porta-fusível em linha | Interrompe o circuito durante um evento de sobrecorrente | Tipo de fusível, classificação do porta-fusível, vedação e posicionamento próximo à fonte |
| Relé e soquete | Permite que um gatilho de baixa corrente controle a carga da lâmpada | Classificação do contato, tensão da bobina, encaixe do soquete, proteção contra calor e umidade |
| Cabo do interruptor ou gatilho | Ativa a bobina do relé ou uma função separada da lâmpada | Polaridade, corrente de gatilho, compatibilidade com OEM e uso legal |
| Cabo de terra | Completa o circuito e limita a queda de tensão no lado do terra | Ponto de fixação limpo, segurança do fixador, proteção contra corrosão |
| Conector do lado da lâmpada | Une o chicote à barra de luz | Chave de acoplamento, retenção do terminal, classificação de corrente e estado de vedação |
| Loom, grommets e alívio de tensão | Protege os fios contra abrasão, calor, água e movimento | Material, localização da temperatura, raio de curvatura e suporte de entrada do cabo |
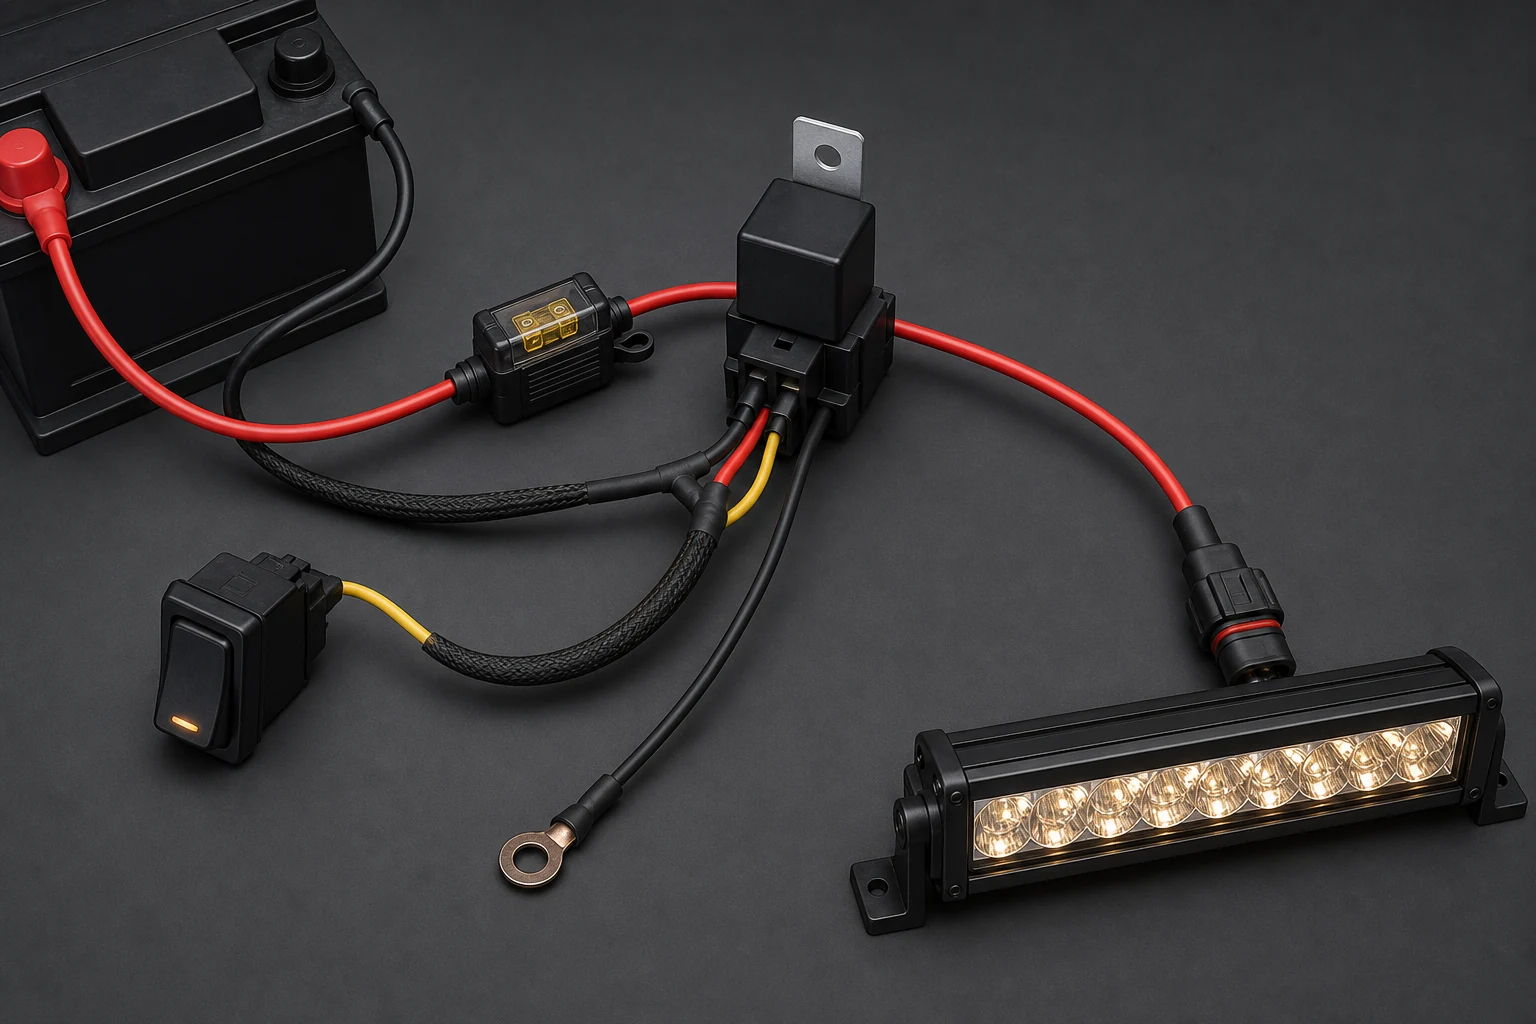
O fusível protege o condutor de um curto-circuito; ele não pode corrigir uma lâmpada sobrecarregada ou um terminal solto. A Littelfuse identifica fusíveis automotivos como dispositivos de sobrecorrente e adverte que curtos-circuitos podem exceder a capacidade do fio e do conector 3. Coordene o fusível, o fio, o relé e o conector.
Conectores vedados são úteis em compartimentos do motor, mas a classificação IP pertence ao conector exato, vedações, entrada do cabo e condição de acoplamento. As informações DEUTSCH DT da TE Connectivity mostram por que contato, tamanho do fio e detalhes de vedação devem corresponder 5. Um invólucro vedado não pode compensar um crimp ruim.
Como funciona um chicote de fiação com relé?
Um chicote com relé usa um pequeno circuito de controle para comutar um circuito separado de alta corrente. O interruptor energiza a bobina do relé; os contatos então conectam a energia fundida da bateria à barra de luz.
A distinção principal é corrente de controle versus corrente de carga. O interruptor e o gatilho transportam a corrente da bobina, enquanto o cabo da bateria, o fusível, os contatos do relé, o terra e o conector da lâmpada transportam a carga principal. Gatilhos do lado negativo, relés protegidos por diodo, relés de cinco pinos e controladores exigem o diagrama fornecido. Nunca inferir a polaridade ou a função do terminal apenas pela cor do fio.
O que significam os terminais de relé 30, 85, 86, 87 e 87a?
Para um relé automotivo comum de quatro pinos, o terminal 30 é a alimentação com fusível, o terminal 87 é a saída normalmente aberta para a barra de luz, e os terminais 85 e 86 são as conexões da bobina. Um relé de cinco pinos pode adicionar o 87a como contato normalmente fechado; ele não deve ser usado como saída da lâmpada, a menos que o circuito seja intencionalmente projetado para esse comportamento.
| Terminal | Função comum | Verificar antes de conectar |
|---|---|---|
| 30 | Entrada de contato do lado da bateria, normalmente após o fusível | Confirmar que o fusível está a montante e que o terminal é classificado para a carga |
| 87 | Saída de contato normalmente aberta para a lâmpada | Confirmar que fica energizado somente quando o relé é acionado |
| 85 | Retorno da bobina do relé | Verificar se o relé possui diodo de supressão ou resistor |
| 86 | Gatilho da bobina do relé | Confirmar que o interruptor ou o gatilho do veículo fornece a polaridade necessária |
| 87a | Contato normalmente fechado em alguns relés de cinco pinos | Deixar sem uso, a menos que o circuito exija especificamente um caminho de comutação |
Se o relé tiver um diodo interno, inverter 85 e 86 pode impedir seu funcionamento ou danificar o circuito de controle. O corpo do relé, o diagrama do fornecedor ou o dispositivo de teste devem identificar esse detalhe. Um bom kit de chicote inclui um diagrama que corresponde ao relé e ao soquete realmente fornecidos, não uma pinagem genérica copiada de outro modelo.
Qual tipo de chicote de fiação para barra de luz você deve escolher?
Escolha o chicote por corrente, tensão, saídas, família de conectores, método de gatilho, comprimento do cabo e ambiente. Um pequeno pod de 12V, uma barra de teto longa, uma configuração de lâmpada dupla e um veículo de trabalho de 24V exigem verificações diferentes.
A seleção do feixe também afeta a carga da lâmpada e o plano de montagem; compare padrões de feixe de barra de luz LED spot, flood e combo antes de finalizar o chicote.
| Tipo de chicote | Melhor aplicação | Principal vantagem | Principal risco |
|---|---|---|---|
| Chicote de saída única | Uma barra de luz ou uma carga emparelhada | Circuito simples e diagnóstico fácil | Deve corresponder à corrente total da lâmpada |
| Chicote de saída dupla | Dois pods ou duas barras pequenas | Uma instalação organizada | Fusível e relé compartilhados podem estar subdimensionados |
| Chicote de alta corrente | Barra grande ou várias lâmpadas | Condutores mais pesados e proteção mais forte | Mais calor, conectores maiores e maiores exigências de roteamento |
| Chicote de painel de interruptores | Vários acessórios controlados separadamente | Caminho de expansão mais claro | Mais fios de gatilho e disciplina de rotulagem necessária |
| Chicote específico para veículo | Interruptor estilo OEM ou roteamento específico do modelo | Encaixe mais limpo e menos fios soltos | Menos flexível entre plataformas de veículos |
Para uma entrada de DRL, âmbar ou luz de posição, use um ramal documentado em vez de presumir que a saída principal do relé alimenta todas as funções. O guia para fiação do modo DRL da barra de luz cobre este circuito de destaque de baixa corrente.
A escolha do conector depende do ambiente. Uma alegação de "à prova d'água" pode exigir os terminais corretos, vedações traseiras, trava de cunha e a metade correspondente. O guia para classificações IP para luzes LED e conectores explica por que uma classificação de invólucro não é uma classificação completa do chicote.
Como você escolhe o bitola de fio, fusível e relé corretos?
Comece com a corrente medida ou especificada, depois verifique a ampacidade, o comprimento do cabo de ida e volta, a queda de tensão, a temperatura, a classificação do conector e a coordenação do fusível. A corrente medida e a folha de dados devem superar uma alegação de potência de mercado.
A tabela é uma exemplo de planejamento ilustrativo, não uma prescrição universal. Assume 13,8V, condutores de cobre, uma meta de queda de tensão de 3% e o comprimento de ida e volta indicado. Calor, construção SAE versus AWG, isolamento, terminais e regras locais podem exigir um condutor maior.
| Carga da barra de luz | Corrente aproximada a 13,8V | Comprimento de ida e volta do exemplo | Verificação inicial do condutor | Ponto de verificação do fusível | Ponto de verificação do relé |
|---|---|---|---|---|---|
| 60W | 4,3A | 15 ft / 4,6m | Cerca de AWG 14 ou maior após verificações de queda de tensão e ampacidade | Frequentemente 7,5-10A, apenas se os dados do fio e da lâmpada suportarem | Classificação de contato de 15-20A ou superior |
| 120W | 8,7A | 15 ft / 4,6m | Cerca de AWG 10-12 dependendo da construção e desclassificação | Frequentemente 10-15A, compatível com o fio e a lâmpada | Classificação de contato de 20-30A ou superior |
| 240W | 17,4A | 20 ft / 6,1m | Cerca de AWG 6-8 após o cálculo | Frequentemente 20-25A, nunca acima do limite do condutor protegido | Classificação de contato de 30-40A ou superior |
| 480W | 34,8A | 20 ft / 6,1m | Cerca de AWG 4-6 após o cálculo | Frequentemente 40-50A apenas se todo o circuito suportar | Classificação de contato de 50-60A ou um projeto de alta corrente construído para essa finalidade |
Use a corrente de carga e ida e volta comprimento no Blue Sea Systems Circuit Wizard, depois verifique a ampacidade do condutor e as condições do compartimento do motor 4. O fio deve satisfazer tanto a capacidade de corrente quanto a queda de tensão.
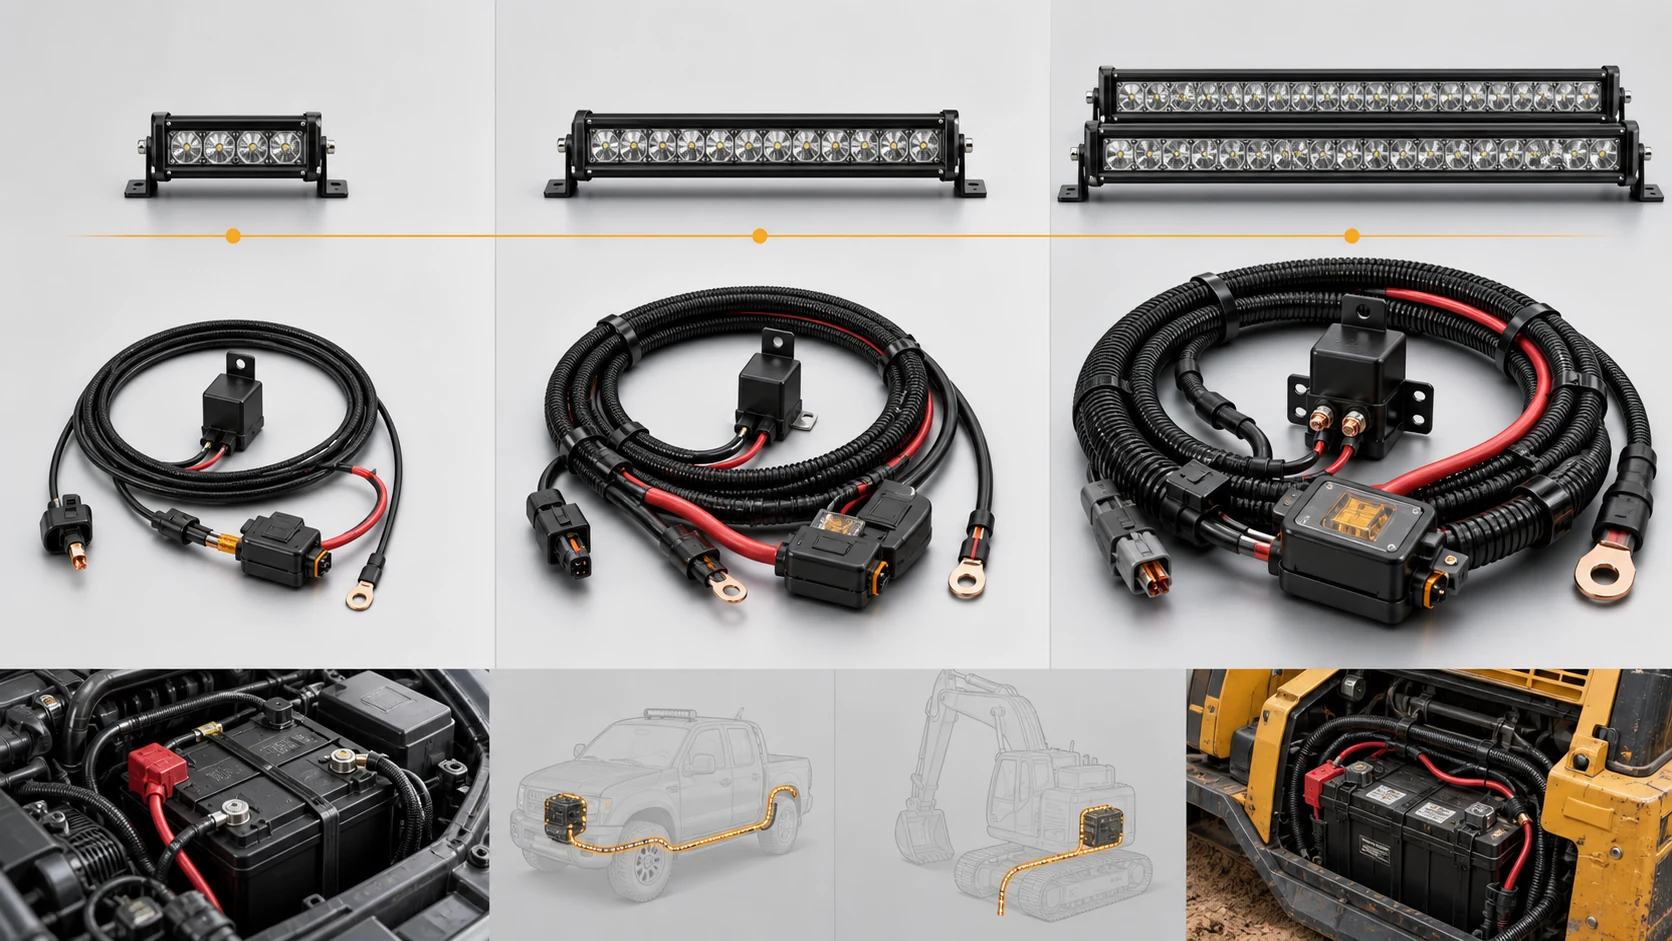
Coloque o fusível próximo à fonte positiva. Ele deve proteger o menor condutor e permanecer dentro das classificações do suporte, terminais, relé e lâmpada. A abertura repetida do fusível é um sinal de diagnóstico, não um motivo para instalar um fusível maior.
Como você instala um chicote de fiação para barra de luz com segurança?
Instale com a bateria desconectada, a rota planejada, o fusível próximo à fonte e cada cabo protegido contra calor, abrasão, água e movimento. Teste o circuito finalizado sob carga antes de recolocar os acabamentos.
- Confirme a especificação. Registre tensão, corrente, conector, entradas de acionamento e se o veículo é 12V ou 24V.
- Planeje a rota. Evite escapamentos, correias, ventiladores, peças de direção, dobradiças, suportes afiados e pontos de esmagamento. Use um ilhós em cada passagem.
- Instale a proteção. Coloque o fusível perto da fonte positiva e monte o relé longe de calor descontrolado e água.
- Torne o aterramento confiável. Use um caminho de retorno limpo e seguro e proteja a conexão finalizada contra corrosão.
- Fixe o cabo. Adicione espaguete, clipes, alívio de tensão e folga de serviço. Não deixe o conector suportar a tensão do cabo.
- Verifique o acionamento. Entradas de farol alto, ignição, ré ou iluminação de fábrica podem ter limites legais ou de controle de carroceria. Use a interface especificada quando necessário.
- Teste sob carga. Verifique a tensão da lâmpada, corrente, temperaturas, queda no aterramento e cintilação após o sistema atingir a temperatura normal.
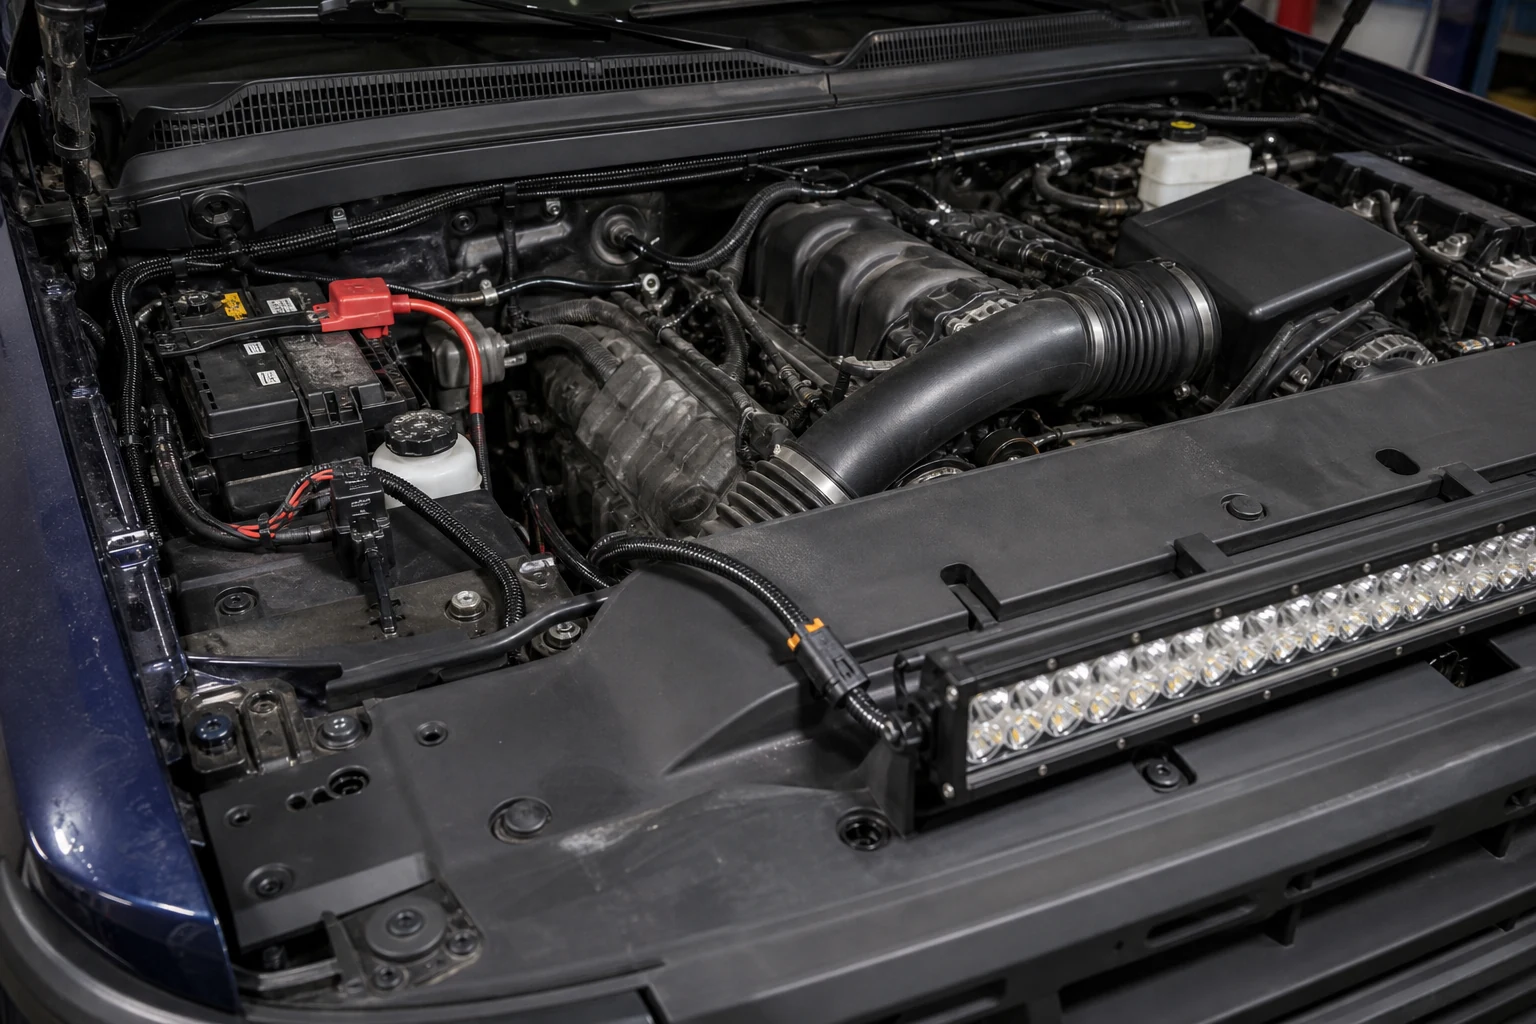
Para uso em via pública, uma barra de luz auxiliar não substitui os faróis obrigatórios. As regras dos EUA para veículos comerciais abordam lâmpadas auxiliares, montagem e orientação 2; as regras locais variam.
Como você soluciona problemas em um chicote de fiação para barra de luz?
Diagnostique da fonte para a carga: bateria, fusível, gatilho do relé, saída do relé, terra, conector e, por fim, a lâmpada. Isto é mais rápido do que substituir peças aleatoriamente.
| Sintoma | Primeiras verificações | Causa provável ou próxima ação |
|---|---|---|
| Sem luz e sem clique do relé | Tensão da bateria, continuidade do fusível, tensão do gatilho, terra da bobina | Fusível aberto, gatilho ausente, polaridade da bobina errada ou terra deficiente |
| O relé clica mas a lâmpada permanece apagada | Tensão no terminal 87, terra da lâmpada, ajuste do pino do conector | Contacto aberto, crimpagem solta, pino invertido ou falha de terra do lado da lâmpada |
| O fusível abre imediatamente | Desligue a lâmpada, inspecione o cabo positivo e o conector | Curto-circuito para terra, cabo esmagado, ponte de água ou tamanho de fusível errado |
| A luz cintila ou escurece num percurso longo | Meça a tensão na bateria e na lâmpada durante o funcionamento | Condutor subdimensionado, terra solto, resistência de contacto elevada ou tensão da bateria baixa |
| O conector ou o porta-fusível aquece | Verifique a corrente, a tensão do terminal, a crimpagem e as superfícies de contacto | Sobrecarga, conector subdimensionado, crimpagem deficiente ou contacto oxidado |
| Funciona a seco mas falha após chuva ou lavagem | Inspecione o vedante traseiro, o encaixe de acoplamento, a entrada do cabo e a corrosão | O conector não está vedado na sua condição instalada ou está a entrar água no chicote |
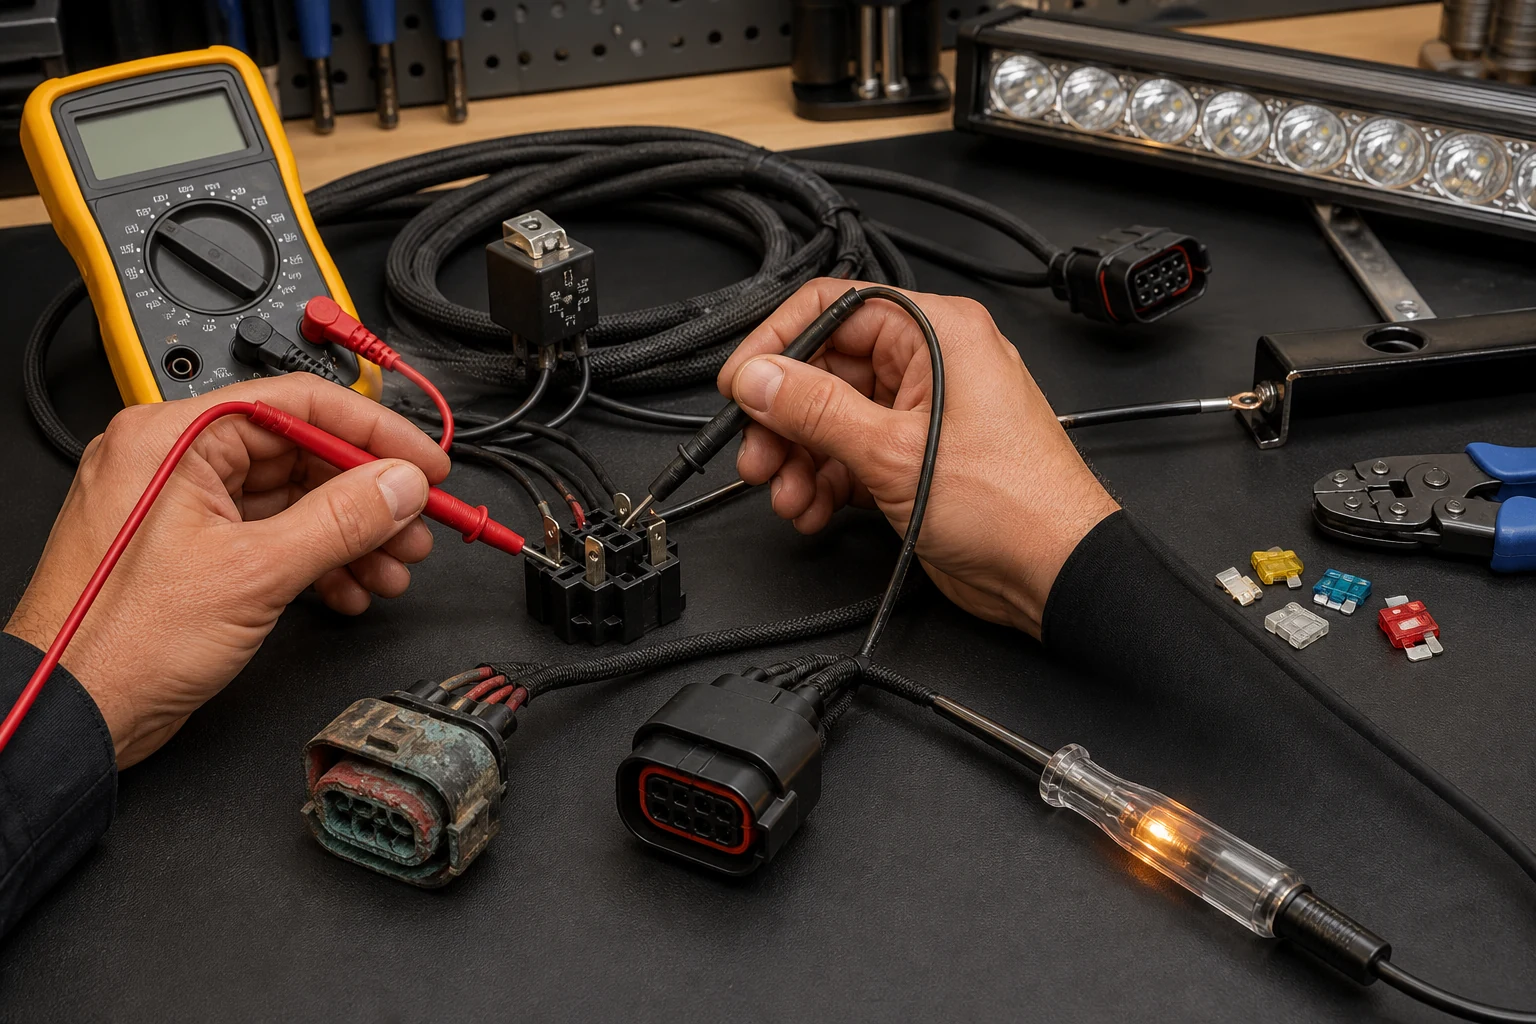
A continuidade por si só não prova que uma ligação de alta corrente está saudável. Uma crimpagem fraca pode passar num teste sem carga mas criar queda de tensão ou calor sob carga, por isso meça a tensão durante o funcionamento e inspecione o terminal mecanicamente.
O que os compradores devem verificar antes de adquirir kits de chicote para barra de luz?
Antes de aprovar um kit de chicote, solicite uma lista de materiais específica para o modelo e um registo de teste de amostra que relacione a classificação da lâmpada com o cabo exato, porta-fusível, relé, conector, interruptor, comprimento e tensão do veículo.
- Âmbito elétrico: tensão nominal, corrente medida, corrente contínua, saídas e gatilhos.
- Proteção: tipo e localização do fusível, classificação do porta-fusível, número de peça do relé, classificação do contacto, supressão da bobina e teste de curto-circuito.
- Condutores: construção do cabo, tamanho AWG ou mm2, temperatura do isolamento, comprimento total e queda de tensão em carga.
- Conectores: número de peça do acoplamento, tamanho do terminal, vedante, ferramentas de crimpagem, teste de retenção e fronteira IP no estado acoplado.
- Instalação: buchas, chicote, clipes, alívio de tensão, raio de curvatura, folga térmica, etiquetagem e diagrama correspondente.
- Qualidade: registos de teste de tração, inspeção de terminais, testes de carga e térmicos, embalagem, rastreabilidade de lote e controlo de revisões.
Alinhe o chicote com a gama de produtos de barras de luz LED automóveis em vez de um kit genérico para todas as barras. Compare o pacote entregue, a etiqueta, o conector, o comprimento e a evidência de teste—não apenas a arte da cotação.
Conclusão: Trate o chicote como parte do sistema de iluminação
Trate o chicote como um sistema de baixa tensão protegido: verifique a carga, calcule as necessidades do cabo de ida e volta, proteja o condutor mais pequeno, confirme as classificações do relé e do conector, encaminhe longe do calor e da abrasão e depois teste sob carga.
Perguntas Frequentes
Precisa de um relé para uma barra de luz LED?
A maioria das barras de luz LED médias e grandes deve usar um chicote de relé com fusível para que o interruptor transporte corrente de controlo. As lâmpadas pequenas podem ser diferentes; siga o manual e a carga medida.
Que tamanho de fusível precisa uma barra de luz de 120W?
A 13,8V, 120W são cerca de 8,7A antes das perdas. Um fusível de 10-15A é apenas um ponto de partida; deve proteger o condutor e corresponder à classificação de cada componente.
Pode usar-se um chicote de fios de barra de luz de 12V num veículo de 24V?
Apenas quando a barra de luz, a bobina do relé, o interruptor, o porta-fusível, o conector e outros componentes forem classificados para 24V. Um relé de 12V pode falhar mesmo com cabo pesado.
O que fazem os terminais 30 e 87 em um relé?
Em um relé comum, 30 é a entrada com fusível e 87 a saída normalmente aberta. Verifique o diagrama porque relés de cinco pinos e com proteção de diodo diferem.
Por que o fusível da minha barra de luz continua queimando?
Verifique se há um cabo em curto, chicote esmagado, água, lâmpada danificada, suporte subdimensionado ou carga excessiva. Não instale um fusível maior primeiro.
Os conectores DT são à prova d'água para a fiação da barra de luz?
Algumas famílias DEUTSCH DT são vedadas ambientalmente, mas a classificação depende da peça, terminais, vedações, tamanho do cabo e condição de acoplamento. O nome por si só não prova que todo o chicote é à prova d'água.
Referências
[1] Administração Nacional de Segurança no Tráfego Rodoviário. (2019). Interpretação da FMVSS No. 108 sobre iluminação suplementar.
[2] Código Eletrônico de Regulamentos Federais. (2026). 49 CFR 393.24, Requisitos para faróis, faróis auxiliares de condução e faróis de neblina dianteiros.
[3] Littelfuse. (2020). Guia de Aplicações de Eletrônica Automotiva.
[4] Blue Sea Systems. Circuit Wizard para dimensionamento de cabos CC e planejamento de proteção de circuitos.
[5] TE Connectivity. Conectores automotivos vedados DEUTSCH DT.