Sandpaper grit is the abrasive particle size on the sandpaper surface. In automotive work, grit decides how aggressively the paper cuts, how deep the scratch pattern is, and whether the next primer, paint, clear coat, or polish step can remove those scratches.
Lower grit numbers cut faster and leave deeper scratches. Higher grit numbers cut slower and leave finer scratches. The key is not to pick the smoothest paper immediately; the key is to move through a controlled grit sequence so each step removes the scratches from the step before it.
This guide gives a practical automotive grit chart, explains P-grit language, and shows how to choose grit for filler, primer, paint prep, wet sanding, and clear coat finishing.
Table of Contents
- What does sandpaper grit mean?
- What is the automotive sandpaper grit chart?
- What is the difference between coarse, medium, fine, and ultra-fine grits?
- How should grit change from body filler to primer to paint?
- Why do P-grit and ordinary grit numbers sometimes feel different?
- How do you avoid visible sanding scratches?
- How should buyers evaluate sandpaper grit quality?
- Conclusion: Grit choice is really scratch control
- Frequently Asked Questions
- References
What does sandpaper grit mean?
Sandpaper grit means the size and spacing of abrasive grains bonded to the backing. A lower number means larger grains and faster cutting; a higher number means smaller grains and a finer finish.
In automotive work, grit is a language for scratch depth. P80 does not simply mean “rough.” It means the scratch is deep enough for aggressive shaping and too deep for direct paint prep. P600 does not simply mean “smooth.” It means the surface is usually close to final primer or paint preparation, depending on the coating system.
The related automotive sandpaper guide explains the broader product side: abrasive mineral, backing, wet/dry paper, sanding discs, blocks, and application formats. This article focuses on the grit number itself.
What is the automotive sandpaper grit chart?
An automotive grit chart maps grit ranges to repair stages, from stripping and filler shaping to primer sanding, paint preparation, and clear coat finishing. It helps prevent the common mistake of using one grit for too many jobs.

| Grit Range | Category | Typical Automotive Use | Notes |
|---|---|---|---|
| P36-P80 | Very coarse | Paint stripping, heavy filler shaping | Use carefully; scratches are deep |
| P100-P180 | Coarse to medium | Body filler shaping, featheredge repair | Step down before primer |
| P220-P320 | Medium | Primer surfacer prep, old paint leveling | Common before high-build primer |
| P400-P600 | Fine | Final primer sanding, paint prep | Often used before basecoat or sealer |
| P800-P1200 | Very fine | Wet sanding paint, blending, nib removal | Good for controlled defect removal |
| P1500-P3000+ | Ultra-fine | Clear coat refinement before polishing | Must be followed by compound/polish |
This table is practical, not universal. Paint systems, primer build, sealer use, repair size, and manufacturer instructions can change the exact grit. Abrasive brands publish process charts because scratch control depends on the full system, not a single number 2.
What is the difference between coarse, medium, fine, and ultra-fine grits?
Coarse grits remove material, medium grits shape and level, fine grits prepare surfaces for coating, and ultra-fine grits refine paint or clear coat before polishing. The categories are useful because they match the purpose of the scratch.
Coarse grit is for fast correction. It can remove paint, knock down body filler, or open a repair edge. It is not a finishing grit. If coarse scratches are left too close to final paint, they can shrink back, show through primer, or require extra rework.
Medium grit is the bridge. It levels filler, refines rough shaping, and prepares surfaces for high-build primer. Fine grit is for final preparation. It gives primer or paint a controlled mechanical profile without leaving heavy scratches.
Ultra-fine grit is different because it is often used on paint or clear coat, not just under paint. This is where the related wet sanding vs dry sanding guide fits naturally, because fine finishing often depends on water, slurry control, squeegee checks, and careful polishing afterward.
How should grit change from body filler to primer to paint?
Grit should become finer as the repair moves toward paint. Each step should remove the visible scratch pattern from the previous step before moving forward.
For body filler, technicians often start coarse enough to shape the material while it still needs contour correction. Then they refine the repair with medium grits so primer does not have to bury deep scratches. For primer surfacer, the goal is flatness and uniform texture. Guide coat helps reveal low spots and remaining scratches.
For paint prep, the surface must be fine enough for the coating system but not polished so smooth that adhesion suffers. This is why paint technical data sheets matter. Some systems may call for P400, others P500 or P600, and some blend zones need finer abrasives.
For clear coat repair, the grit is much higher. P1500, P2000, P3000, or finer abrasives may be used to remove defects before compounding. The finer the sanding scratch, the easier the polishing step becomes.
One useful workshop habit is to write the grit sequence on the job card or masking paper before sanding starts. That sounds simple, but it prevents a common repair problem: one technician starts a panel with a coarse grit, another assumes it has already been refined, and the paint booth later reveals scratches that should have been removed earlier. A visible sequence also helps apprentices understand that grit choice is a process, not a one-time guess.
Why do P-grit and ordinary grit numbers sometimes feel different?
P-grit numbers come from the FEPA grading system used widely for coated abrasives, while some markets also use CAMI or other grit references. Similar numbers do not always mean identical particle sizing.
This matters when buyers compare products across countries or suppliers. A shop may say “320 grit” casually, but a product label may say P320. In many daily uses the difference is manageable, but professional refinishing depends on predictable scratch patterns.
FEPA publishes standards for abrasive grain sizing and the P-grade coated abrasive system 1. For automotive buyers, the practical point is simple: keep grading language consistent in product listings, cartons, sample labels, and technical guidance.
If a product program mixes P-grit and non-P grit without explanation, installers can choose the wrong step. That can turn into visible scratches, adhesion problems, or polishing delays.
How do you avoid visible sanding scratches?
Avoid visible sanding scratches by using a gradual grit sequence, guide coat, clean abrasive, proper block support, and enough time to remove the previous scratch pattern. Most visible scratch problems come from skipping steps or sanding unevenly.

Do not jump from a very coarse grit straight to a fine grit and expect the fine paper to fix everything. Fine paper can polish the tops of deep scratches while leaving the valleys behind. Those hidden scratches may show later under primer, basecoat, clear coat, or polishing light.
Use a block where flatness matters. Finger sanding can create grooves because pressure follows the fingers. On curved areas, use flexible pads or foam-backed abrasives, but keep pressure light.
Cleanliness also matters. One stray coarse particle trapped under a fine disc can create a deep circular scratch. Change paper when it clogs. Blow off or wipe the surface between steps. Do not let dry sanding dust contaminate wet sanding stages.
Light is part of scratch control too. A panel can look ready under flat overhead light and still show sanding lines under side light. Raking light, guide coat, and a clean wipe between grits help reveal whether the previous scratch pattern is truly gone before the repair moves toward paint.
How should buyers evaluate sandpaper grit quality?
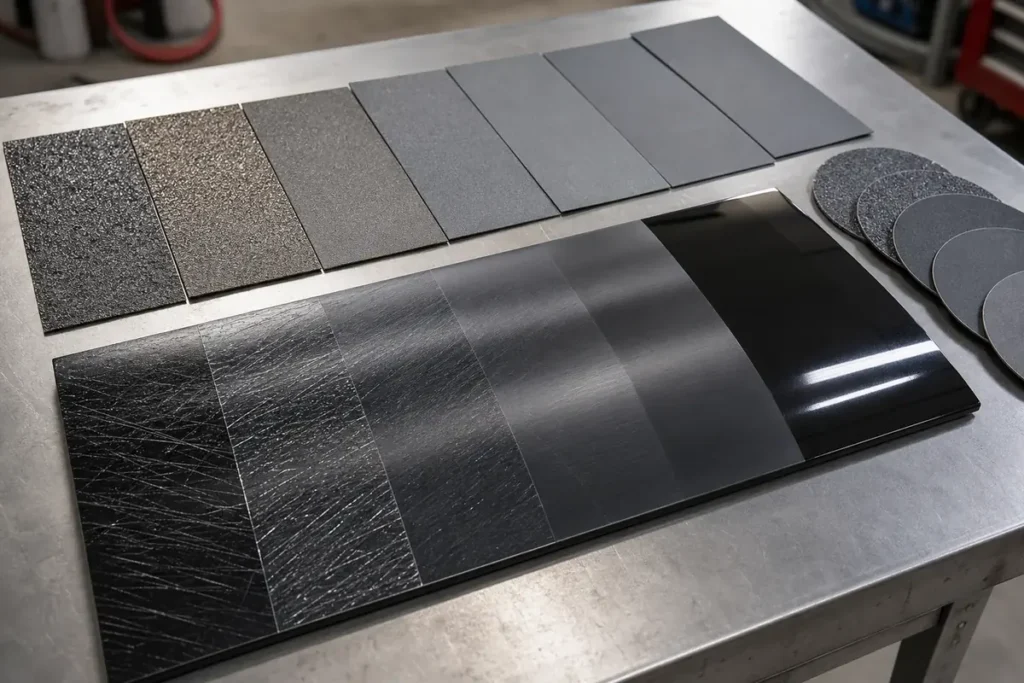
Buyers should evaluate grit quality by checking scratch consistency, cut rate, backing strength, clog resistance, hook-and-loop stability, wet durability, packaging, and labeling accuracy. Grit number is only useful if the product behaves consistently.
For sample testing, sand the same primer or paint panel with multiple sheets from the same batch. The scratch pattern should look even under raking light. Discs should not shed grain, wobble, or lose grip. Wet/dry sheets should not curl excessively or delaminate after soaking.
For product-line planning, the automotive sandpaper and abrasives category is a practical starting point. Buyers can also browse the broader Yirox product range when building an auto body accessory assortment.
Yirox Team sample checks usually focus on grit feel, scratch consistency, backing, hole pattern, carton strength, and batch repeatability. That matters because a grit chart is only useful when the product in the carton matches the grit promised on the label.
Conclusion: Grit choice is really scratch control
Sandpaper grit is not just a number. It is a way to control scratch depth, cut speed, surface flatness, coating adhesion, and finishing time. Coarse grits shape and remove material, medium grits refine repair work, fine grits prepare surfaces for coating, and ultra-fine grits prepare clear coat for polishing.
The best grit choice depends on the surface and the next step. Body filler, primer, old paint, plastic, bare metal, basecoat prep, and clear coat correction all need different abrasive behavior.
For readers building out a fuller knowledge base, the related Yirox technical guides can sit alongside product pages and help customers use abrasives correctly instead of guessing from grit numbers alone.
Frequently Asked Questions
What grit sandpaper should I use before painting a car?
Many automotive paint-prep jobs use P400-P600, but the exact grit depends on the paint system, primer, sealer, and surface. Always follow the coating manufacturer’s technical recommendation when available.
Is higher grit always better for auto body work?
No. Higher grit is smoother, but it may cut too slowly or create a surface that is too fine for the next coating. Use the grit that matches the repair stage.
What grit removes orange peel from clear coat?
Orange peel correction often uses very fine wet sanding, commonly around P1500-P3000 depending on severity and clear coat thickness. It must be followed by compounding and polishing.
Can I skip sandpaper grits?
Small jumps are normal, but large jumps can leave deep scratches hidden under a finer scratch pattern. If the previous scratches are still visible, do not move to the next grit yet.
What grit should I use for body filler?
Body filler shaping often starts around P80-P120 and then moves finer before primer. The exact choice depends on filler hardness, repair size, and how much material must be shaped.
References
[1] FEPA. (2026). *Coated Abrasives Standards and P-Grit System*.
[2] Norton Abrasives. (2026). *Sandpaper Grit Chart*.
[3] 3M. (2026). *Automotive Abrasive Grit and Finishing Resources*.
[4] Mirka. (2026). *Automotive Sanding Process Guidance*.