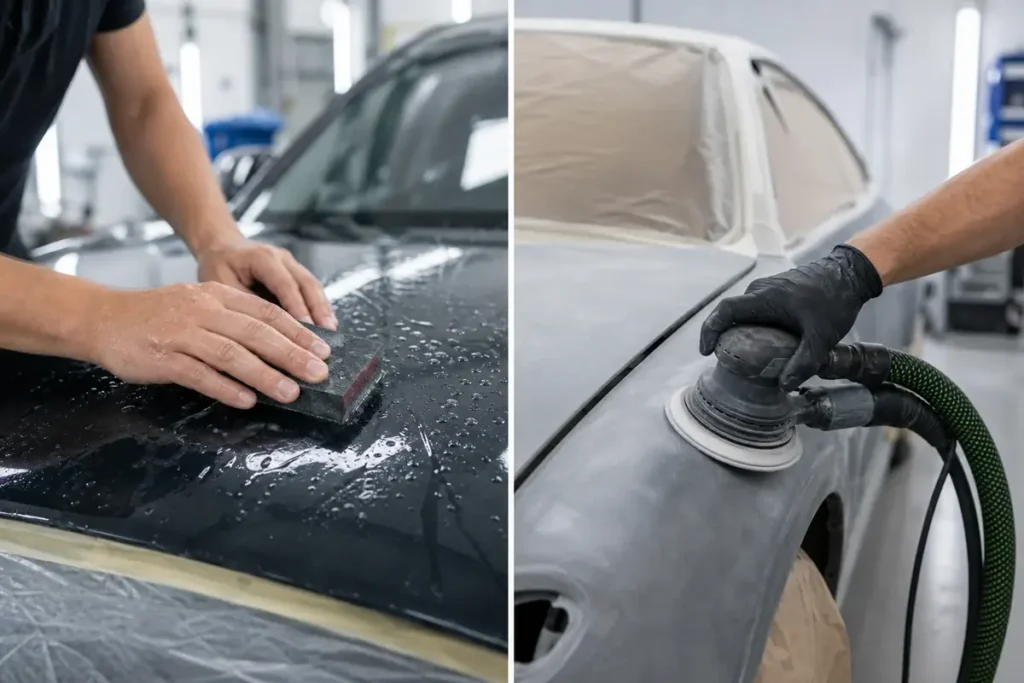
Wet sanding uses water as a lubricant and residue carrier, while dry sanding removes material without water and usually depends on dust control. In auto body work, dry sanding is usually faster for filler and primer, while wet sanding is often preferred for fine paint and clear coat correction.
Neither method is automatically better. The right choice depends on the repair stage, surface material, grit, dust-control setup, visibility needs, and what happens after sanding. A shop may dry sand primer in the morning and wet sand a clear coat nib in the afternoon.
This guide explains the practical difference between wet sanding and dry sanding, when each method is used, which grits make sense, and how to avoid common auto body mistakes.
Table of Contents
- What is the main difference between wet sanding and dry sanding?
- When should you use wet sanding in auto body work?
- When should you use dry sanding in auto body work?
- How do wet sanding and dry sanding compare?
- What grits are best for wet sanding and dry sanding?
- What safety and cleanup issues should you consider?
- How should buyers choose wet/dry abrasive products?
- Conclusion: Use both methods where they make sense
- Frequently Asked Questions
- References
What is the main difference between wet sanding and dry sanding?
The main difference is that wet sanding uses water to reduce clogging, cool the surface, and carry away sanding residue, while dry sanding cuts without water and leaves dust that must be managed. Wet sanding is usually cleaner for fine clear coat work; dry sanding is usually faster for shaping and surface preparation.

Wet sanding creates slurry. That slurry helps show what is being removed, but it can also hide the surface until it is wiped or squeegeed. Dry sanding creates dust. Dust makes defects easier to see in some primer stages, but it requires extraction, ventilation, cleaning, and respiratory protection.
The related automotive sandpaper guide explains the abrasive types behind both methods. The key is to use a product designed for the method. Not every paper backing survives water, and not every dry abrasive resists clogging well.
When should you use wet sanding in auto body work?
Wet sanding is best for fine finishing tasks such as clear coat defect removal, orange peel reduction, dust nib removal, paint leveling, and final scratch refinement before polishing. It is usually done with fine to ultra-fine wet/dry abrasive.

Water helps reduce abrasive loading and keeps the surface cooler. It also makes fine sanding feel smoother, especially on clear coat. After a few passes, the technician can wipe the slurry away or use a squeegee to inspect the texture.
Wet sanding is not magic. It can still cut through clear coat if pressure is too high or edges are ignored. It also requires clean water, clean paper, and controlled movement. Dirt trapped under the paper can create deep scratches that are harder to polish out.
Common wet sanding grits include P1000, P1500, P2000, P3000, and finer, depending on defect depth and the polishing system. Some paint correction starts coarser, but that increases risk and should be handled carefully.
When should you use dry sanding in auto body work?
Dry sanding is best for body filler shaping, primer surfacer leveling, old paint preparation, featheredge work, and fast material removal. It is the normal choice when the goal is to shape or level before primer or paint.

Dry sanding gives clear feedback. Guide coat remains visible, dust shows high and low areas, and the technician can move quickly with a block or DA sander. Modern dust-extraction systems make dry sanding much cleaner than old open-dust methods.
Dry sanding also has limits. It can clog paper when sanding soft paint, fresh primer, or gummy materials. It can create heat. It can spread dust across the shop if extraction is poor. For final clear coat correction, dry sanding is less common unless using specific fine finishing discs designed for that process.
Major abrasive systems often separate dry sanding for filler/primer from wet or fine finishing stages because each step has different dust, scratch, and inspection needs 1.
The pad setup matters as much as the paper. A hard block or firm pad keeps filler and primer flatter, while a soft interface pad follows curves and reduces edge pressure. Using the wrong backing can make the surface feel smooth while still leaving waves, low spots, or rounded body lines.
How do wet sanding and dry sanding compare?
Wet sanding gives better residue control for fine finishing, while dry sanding gives faster cutting and better workflow speed for filler and primer. The comparison is less about preference and more about repair stage.
| Factor | Wet Sanding | Dry Sanding |
|---|---|---|
| Best use | Clear coat, paint defects, ultra-fine finishing | Filler, primer, old paint prep, feathering |
| Residue | Water slurry | Airborne and surface dust |
| Speed | Usually slower | Usually faster |
| Surface visibility | Must wipe/squeegee to inspect | Easier to inspect primer and guide coat |
| Clogging control | Water helps reduce loading | Depends on abrasive coating and dust extraction |
| Safety concern | Slurry cleanup, water near tools | Dust, respiratory exposure, shop contamination |
| Common tools | Hand pad, soft block, fine wet/dry paper | Sanding block, DA sander, extraction discs |
The important point is sequencing. A technician may dry sand body filler, dry sand primer with guide coat, then wet sand clear coat after painting. These are different jobs, not competing habits.
What grits are best for wet sanding and dry sanding?
Dry sanding commonly uses coarser and medium grits for shaping and prep, while wet sanding commonly uses finer grits for paint and clear coat finishing. The grit must match the surface and the next step.
For dry sanding, body filler shaping may start around P80-P120 and move finer before primer. Primer surfacer may be sanded with P220-P400 depending on build and coating recommendations. Paint preparation often lands around P400-P600.
For wet sanding, clear coat correction often uses P1500-P3000 or finer. Deeper defects may require more aggressive steps, but that increases the risk of sanding through. If a scratch is too deep for a fine wet sanding step, jumping straight to polishing will not remove it cleanly.
For a more complete grit-by-grit explanation, the related sandpaper grit chart explains how coarse, medium, fine, and ultra-fine grits fit into auto body work.
What safety and cleanup issues should you consider?
Dry sanding needs dust control, and wet sanding needs slurry control. Both methods require clean work habits, appropriate PPE, and awareness of the coatings being sanded.
OSHA’s autobody repair and refinishing guidance highlights hazards around sanding, refinishing materials, ventilation, and respiratory protection 3. NIOSH also provides workplace health guidance for dust and respiratory protection topics 4. The exact PPE depends on the coating, substrate, dust level, and shop process.
Dry sanding dust can travel. Use extraction where possible, clean panels between grits, and avoid blowing dust into other repair areas. Wet sanding reduces airborne dust but creates contaminated slurry that should not be left to dry on the panel, floor, or nearby masking.
Water and electric tools require extra caution. Wet sanding is often done by hand, or with tools designed for wet use. Do not improvise with unsafe electrical setups.
How should buyers choose wet/dry abrasive products?
Buyers should choose wet/dry abrasive products by checking backing durability, cut consistency, water resistance, clog behavior, scratch uniformity, hole pattern, disc attachment, and packaging. The product should match how the end user actually sands.
For wet sanding paper, soak resistance matters. The sheet should not curl badly, split, or shed abrasive. For dry discs, anti-clog performance and hole alignment matter because extraction depends on airflow. For hand sanding, flexibility and backing feel matter. For block sanding, flat contact and tear resistance matter.
The automotive sandpaper and abrasives category is the right Yirox starting point for wet/dry sheets, discs, and related abrasive formats. Buyers building a wider catalog can also review the broader Yirox product range.
Yirox Team sample checks typically look at soak behavior, scratch consistency, backing strength, disc attachment, packaging, and label clarity. Those details help prevent returns because a wet/dry abrasive must work in the actual method advertised.
Conclusion: Use both methods where they make sense
Wet sanding and dry sanding are not rivals. Dry sanding is usually better for fast shaping, filler work, primer surfacer, old paint prep, and guide coat leveling. Wet sanding is usually better for fine paint and clear coat correction where water helps control residue and surface heat safely.
The smart approach is to use the method that fits the surface and the next step. Dry sand where speed and flatness matter. Wet sand where fine control and finish refinement matter. Use the right grit sequence, keep the abrasive clean, and protect the technician from dust or slurry exposure.
For more practical background, the related Yirox repair and product guides can support customers who need to choose abrasives with less guesswork and fewer paint-prep mistakes.
Frequently Asked Questions
Is wet sanding better than dry sanding for cars?
Wet sanding is better for fine paint and clear coat correction, while dry sanding is better for filler, primer, and fast surface preparation. The better method depends on the job.
Can you wet sand primer?
Some primer can be wet sanded, but many shops prefer dry sanding primer because guide coat and surface shape are easier to read. Follow the primer manufacturer’s instructions.
Does wet sanding remove scratches?
Wet sanding can remove or level fine paint and clear coat defects, but it also creates its own sanding scratches. Those scratches must be refined and polished afterward.
Is dry sanding dangerous?
Dry sanding can create dust that should be controlled with extraction, ventilation, and appropriate PPE. The risk depends on the material being sanded and the shop’s safety process.
What grit should I use for wet sanding clear coat?
Many clear coat correction jobs use P1500-P3000 or finer, depending on defect depth and polishing plan. Use the least aggressive grit that can remove the defect safely.
References
[1] 3M. (2026). *Automotive Wet Sanding and Finishing Resources*.
[2] Mirka. (2026). *Dust-Free Sanding and Automotive Refinishing Guidance*.
[3] OSHA. (2026). *Autobody Repair and Refinishing Safety and Health Topics*.
[4] NIOSH. (2026). *Workplace Safety and Health Topics for Dust and Respiratory Protection*.