A sanding disc is a round abrasive product used with a sander or backing pad to remove material, shape filler, level primer, prepare paint, or refine a vehicle surface. In automotive work, the right sanding disc is chosen by grit, size, backing, attachment style, hole pattern, abrasive grain, and the surface being sanded.
Sanding discs are popular because they make large-panel sanding faster and more consistent than loose sheets. They are not all the same, though. A coarse adhesive-back disc for stripping paint behaves very differently from a fine hook-and-loop disc used on primer or a mesh disc designed for dust extraction.
This guide explains sanding disc types, common sizes, how to use them on cars, and what buyers should check before adding automotive sanding discs to a repair or refinishing range.
Table of Contents
- What does a sanding disc do in auto body work?
- What are the main types of sanding discs?
- What sanding disc sizes are common for cars?
- How do you choose the right grit for a sanding disc?
- How should you use sanding discs on cars without causing damage?
- What mistakes cause pigtails, swirl marks, and uneven sanding?
- What should buyers check before sourcing sanding discs?
- Conclusion: A sanding disc is part of a full sanding system
- Frequently Asked Questions
- References
What does a sanding disc do in auto body work?
A sanding disc cuts the surface with abrasive grains while the tool and pad control motion, pressure, and contact area. On cars, discs are commonly used for paint removal, filler shaping, primer leveling, old paint preparation, and fine finishing.
Compared with hand sanding sheets, discs are faster on broad panels and more repeatable when used with a DA sander. They help keep scratch patterns more uniform, especially when the disc, pad, and grit are matched to the job. For readers who want the broader product background, the related automotive sandpaper guide explains sheets, rolls, discs, wet/dry paper, backing, and grit selection.
A disc does not replace judgment. It can remove too much material quickly, especially on edges, body lines, plastic bumpers, and thin clear coat. The technician still needs to choose the correct grit, keep the tool flat, and clean the surface between steps.
What are the main types of sanding discs?
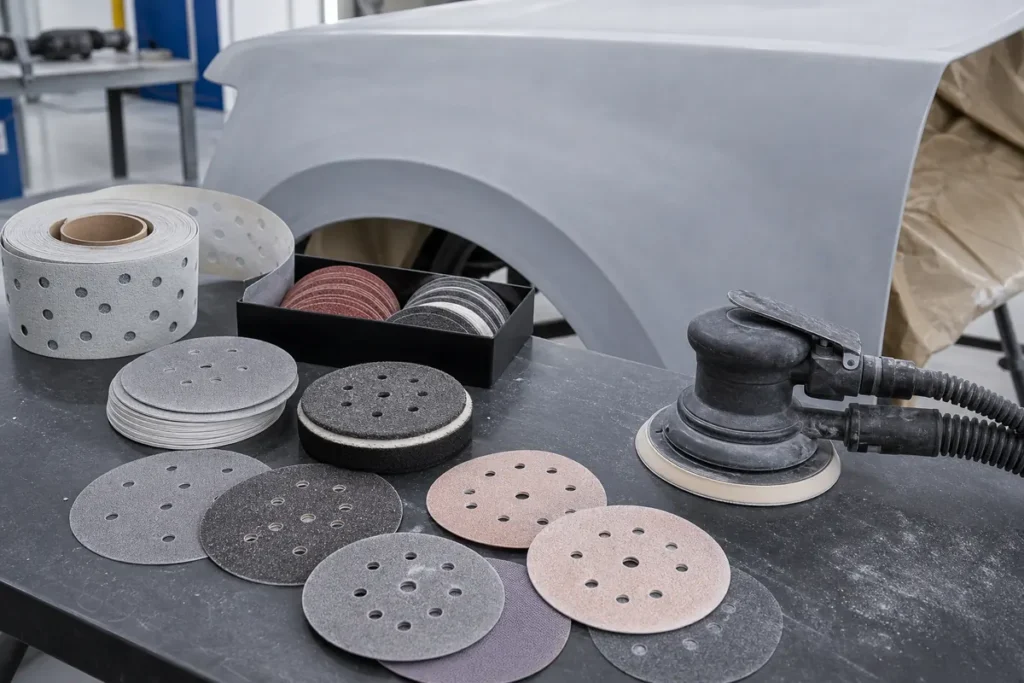
The main automotive sanding disc types are hook-and-loop discs, PSA adhesive-back discs, film discs, paper discs, foam-backed discs, net or mesh discs, and dust-extraction discs. Each type changes cutting feel, disc life, dust control, and how quickly the disc can be changed.

Hook-and-loop discs attach to a matching backup pad and are easy to change. They are common in body shops because technicians move through grits often. PSA discs use a pressure-sensitive adhesive and can feel very stable, but the pad must be clean and the disc is less convenient to remove and reuse.
Film-backed discs often give a very consistent surface and strong tear resistance. Paper-backed discs are common and cost-effective, but backing strength varies. Foam-backed discs are useful for contour work and fine finishing because they soften the contact. Net or mesh abrasives allow dust to move through a wide open structure, which can improve dust extraction when paired with the right pad and vacuum system.
Major abrasive brands separate sanding disc systems by backing, hole pattern, abrasive grain, and application because dust extraction and scratch consistency are system issues, not just disc issues 1.
What sanding disc sizes are common for cars?
Common automotive sanding disc sizes include 3 inch, 5 inch, 6 inch, and sometimes 7 inch or larger discs. The best size depends on panel shape, tool type, repair area, and how much control the technician needs.
| Disc Size | Common Automotive Use | Main Advantage | Main Caution |
|---|---|---|---|
| 3 inch | Spot repairs, edges, tight areas | Control in small zones | Easy to over-sand if tilted |
| 5 inch | General repair, smaller DA sanders | Good control and speed | Less coverage than 6 inch |
| 6 inch | Body shop primer and paint prep | Efficient on broad panels | Needs good pad control |
| 7 inch+ | Heavy removal or large flat areas | Fast coverage | More aggressive and less forgiving |
Six-inch discs are common in collision repair because they cover a useful area without becoming too hard to control. Three-inch discs are excellent for small repairs, but they can dig into the surface if the operator uses the edge of the pad.
Disc size should match the backup pad. A mismatched disc can overhang, tear, block dust holes, or create an unstable scratch pattern. Hole pattern matters too: a multi-hole disc needs the correct pad and extraction path to work as intended.
How do you choose the right grit for a sanding disc?
Choose sanding disc grit by starting with the repair stage. Coarse grits remove material, medium grits shape and level, fine grits prepare primer and paint, and ultra-fine grits refine paint or clear coat.
For heavy stripping or rough filler shaping, a shop may use coarse discs such as P40-P80. For filler refinement, P120-P180 is common. Primer surfacer and old paint prep often use P220-P400, while final paint preparation may use P400-P600 depending on the paint system. Fine finishing can move into P800-P3000 or higher.
The related sandpaper grit chart gives a more complete grit progression. The important point is not to skip so far that the next disc cannot remove the previous scratch. A fine disc can make deep scratches look dull, but it may not erase them.
How should you use sanding discs on cars without causing damage?
Use sanding discs on cars with a flat pad, clean surface, controlled pressure, correct speed, and a grit sequence that matches the repair. The tool should do the cutting; forcing the disc usually creates heat, pigtails, and uneven scratches.

Keep the disc clean and change it before it stops cutting. A loaded disc rubs instead of cutting, which can heat the surface and create random scratches. Use dust extraction when dry sanding filler or primer. OSHA’s autobody repair guidance treats sanding dust, ventilation, and respiratory protection as important shop safety topics 4.
Work in overlapping passes instead of jumping around the panel. A simple crosshatch pattern helps the technician see whether the disc is cutting evenly and prevents one small area from being sanded too deeply. On primer surfacer, many shops use guide coat to reveal low spots, scratches, and uneven pressure. If the guide coat disappears immediately on a body line but remains in the center of the repair, the tool angle or pad choice probably needs correction.
Use softer pads or interface pads on curves, but use firm blocks or firm pads when flatness matters. On edges and body lines, reduce pressure and avoid lingering. For method choice, the related wet sanding vs dry sanding guide explains when water, slurry, dust extraction, and dry guide coat feedback matter.
What mistakes cause pigtails, swirl marks, and uneven sanding?
Pigtails and swirl marks usually come from contamination, clogged discs, too much pressure, poor dust extraction, a damaged pad, or skipping grit steps. Uneven sanding often comes from tilting the sander or using a soft pad where flatness is needed.
One coarse particle under a fine disc can cut a deep circular scratch. Dust trapped between the disc and panel can do the same thing. Wipe or blow off the panel between grits, keep discs clean, and check the backup pad for wear.
Another common mistake is using the disc edge as a cutting tool. That can gouge primer, round body lines, or burn through clear coat. A sanding disc works best with balanced contact across the pad.
What should buyers check before sourcing sanding discs?
Buyers should check grit consistency, disc flatness, attachment strength, backing durability, hole alignment, dust extraction performance, packaging, label clarity, and batch repeatability. A sanding disc that looks fine in a catalog can fail quickly in a real shop.
Sample testing should include the intended pad and tool. A hook-and-loop disc should attach firmly without wobble. A PSA disc should peel cleanly and hold securely. Multi-hole discs should align with common pads. Mesh discs should extract dust well and resist tearing.
Packaging also deserves attention. Discs should stay flat, dry, clean, and easy to identify by grit and hole pattern. Poor packaging can bend discs, contaminate the abrasive surface, or make mixed grits hard to control in a busy shop. For distributors, clear labels and consistent carton protection reduce picking mistakes and protect the product before it ever reaches the technician.
If the next step is building an automotive abrasive range, the automotive sandpaper and abrasives category is a useful starting point. For tool-specific usage, the related DA sander guide explains why orbit, pad size, and operator control matter.
Yirox Team sample checks usually focus on cut feel, scratch consistency, hole pattern accuracy, attachment stability, packaging, and whether delivered batches match approved samples. These details reduce returns because installers notice poor discs immediately.
Conclusion: A sanding disc is part of a full sanding system
A sanding disc is not just a round piece of sandpaper. It is part of a system made of abrasive grain, backing, grit, pad, attachment style, hole pattern, tool motion, dust extraction, and operator technique.
The right sanding disc speeds up auto body work and leaves a scratch pattern the next step can handle. The wrong disc wastes time, loads up, creates pigtails, or damages edges. Choose the disc around the repair stage, tool, panel shape, and finish requirement.
Frequently Asked Questions
What sanding disc is best for auto body work?
For general auto body work, hook-and-loop discs in 5 inch or 6 inch sizes are common because they are easy to change and work well with DA sanders. The best grit depends on whether the job is filler shaping, primer sanding, paint prep, or finishing.
Can I use woodworking sanding discs on a car?
It is better to use automotive sanding discs. Woodworking discs may clog, cut unevenly, or leave scratch patterns that are not suitable for primer, paint, or clear coat.
What size sanding disc should I use on a DA sander?
Most automotive DA sanders use 5 inch or 6 inch discs, while smaller tools may use 3 inch discs for spot repairs. Always match the disc to the tool’s backup pad.
Why do sanding discs have holes?
Holes help dust move through the disc and pad into an extraction system. Better dust control can reduce clogging, heat, airborne dust, and random scratches.
How often should sanding discs be changed?
Change a sanding disc when it stops cutting cleanly, loads up, tears, loses attachment, or starts creating random scratches. Waiting too long usually costs more time than using a fresh disc.
References
[1] 3M. (2026). *Automotive Sanding Discs and Abrasive Systems*.
[2] Mirka. (2026). *Automotive Sanding and Dust-Free Abrasive Systems*.
[3] Norton Abrasives. (2026). *Sanding Disc and Abrasive Grit Guidance*.
[4] OSHA. (2026). *Autobody Repair and Refinishing Safety and Health Topics*.