Automotive primer is a preparatory coating applied before paint to improve adhesion, protect bare metal, fill minor surface defects, seal repairs, or create a uniform surface for base coat and clear coat. The right primer depends on the substrate, repair stage, coating system, and sanding plan.
Primer is not one product with one job. Epoxy primer, etch primer, primer surfacer, high-build primer, and sealer all behave differently. Some protect metal. Some level scratches. Some seal a repair so color applies more evenly. Choosing the wrong primer or sanding it with the wrong grit can cause poor adhesion, visible scratches, shrinkage, or finish defects.
This guide explains automotive primer types, how primer is applied, which sandpaper grits are commonly used, and what buyers should check when sourcing abrasives for primer preparation.
Table of Contents
- What does automotive primer do?
- What are the main types of automotive primer?
- How do you apply automotive primer correctly?
- What sandpaper grit should you use before primer?
- What grit should you use to sand primer before paint?
- Should primer be wet sanded or dry sanded?
- What mistakes cause primer failure or visible scratches?
- What should buyers check before sourcing primer sanding abrasives?
- Conclusion: Primer works only when the surface and sanding are right
- Frequently Asked Questions
- References
What does automotive primer do?
Automotive primer prepares the surface for paint by improving adhesion, protecting substrates, leveling minor defects, or sealing the repair area. It sits between the raw or repaired surface and the color or clear coating system.
Primer can help paint stick to metal, plastic, filler, old paint, or previous coatings when the correct product is used. It can also fill sanding scratches and small texture differences. Primer surfacer is often sanded after curing so the panel is smoother before paint.
Primer should not be treated as magic filler. It cannot fix poor body work, deep scratches, contamination, rust, or a badly feathered edge by itself. The surface under primer still needs correct sanding, cleaning, and repair preparation.
Refinish coating makers publish technical data because primer performance depends on mixing, film build, flash time, substrate, temperature, and sanding window 1. Those instructions should guide the final process.
What are the main types of automotive primer?
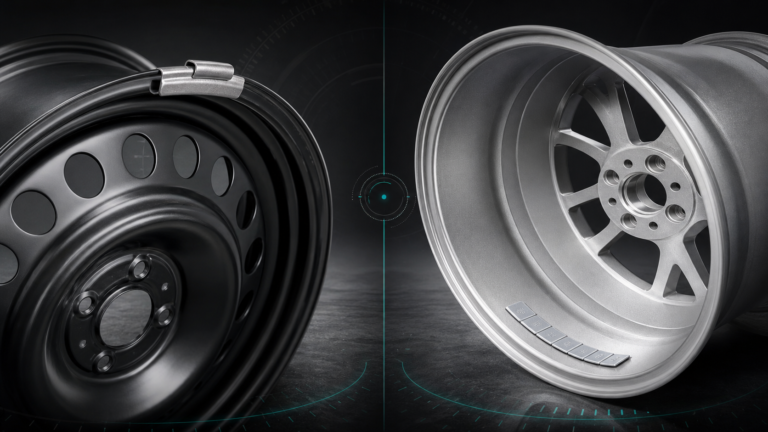
The main automotive primer types are epoxy primer, etch primer, primer surfacer, high-build primer, sealer, and specialty plastic primer or adhesion promoter. Each one solves a different surface problem.

| Primer Type | Main Purpose | Common Use | Sanding Note |
|---|---|---|---|
| Epoxy primer | Adhesion and corrosion resistance | Bare metal and restoration work | May be sanded or topcoated depending on window |
| Etch primer | Chemical bite on bare metal | Small bare metal areas | Not always used under every system |
| Primer surfacer | Filling and leveling | Sanded repair areas | Usually block sanded before paint |
| High-build primer | More film build for blocking | Wavy or repaired panels | Needs proper cure before sanding |
| Sealer | Uniform color and absorption | Before base coat | Often not sanded unless needed |
| Plastic primer | Adhesion on plastic parts | Bumpers and trim | Requires correct substrate prep |
Primer surfacer and high-build primer are the types most closely tied to sanding. They create material that can be block sanded flat. Epoxy and etch primers are more about adhesion and substrate protection. Sealer is often used later to create a uniform base before color.
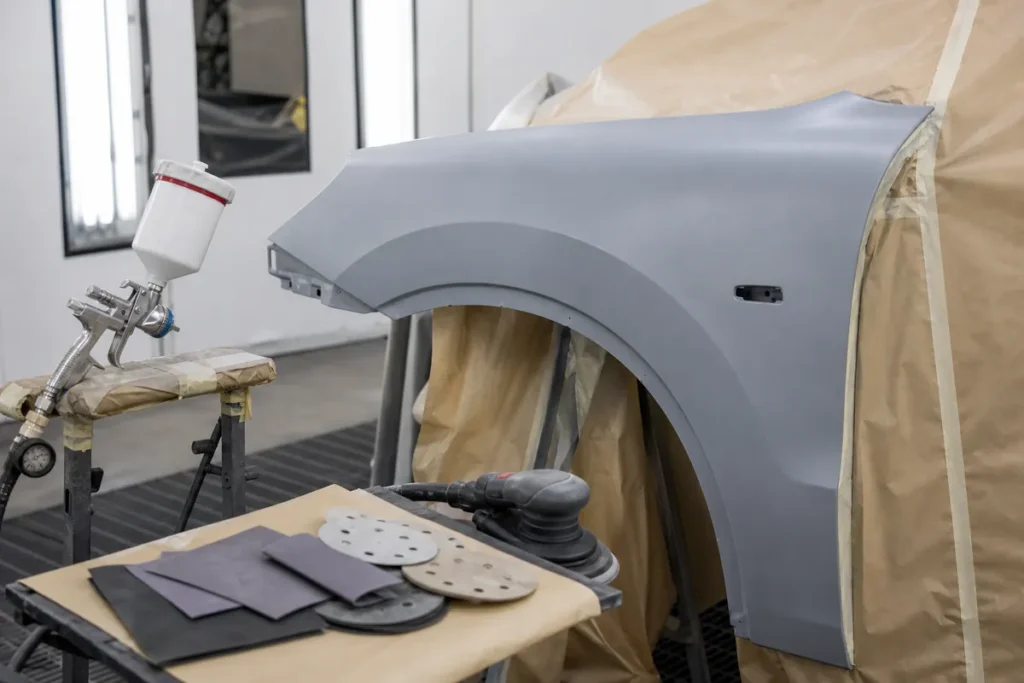
How do you apply automotive primer correctly?
Automotive primer should be applied to a clean, properly sanded, compatible surface, using the correct mix ratio, spray technique, flash time, and film build. The product’s technical sheet matters more than guesswork.
The panel should be cleaned before sanding and again before spraying. Contaminants such as wax, silicone, oil, and dust can cause adhesion problems or surface defects. Sanding should create the right mechanical profile for the primer without leaving scratches too deep for it to fill.
Mixing must be accurate. Too much reducer, wrong hardener, poor induction time, or incorrect film build can affect cure and sanding behavior. Apply coats evenly and allow proper flash time between coats. Heavy wet coats may trap solvent and shrink later.
After primer cures, inspect the surface before sanding. If the primer is too soft, it may clog paper and smear. If it is too thin, blocking may break through quickly. Proper application makes the sanding step more predictable.
What sandpaper grit should you use before primer?
Before primer, use a grit that gives the primer enough bite while leaving scratches the primer can fill. Common ranges may include P180-P320 depending on substrate, primer type, and coating system.
For body filler, P180-P240 may be used before primer surfacer after rough shaping is complete. For old paint or feathered edges, P240-P320 may be common before primer depending on product requirements. For plastic or sensitive surfaces, the required prep may be different.
The related sandpaper grit chart explains how automotive grit ranges progress from shaping to finishing. The related automotive sandpaper guide explains abrasive formats, backing, wet/dry papers, and how surface stage changes sandpaper choice.
Do not sand too fine before a primer that needs mechanical bite. Do not leave scratches too coarse for the primer build. The best answer is always tied to the primer system, not only a universal grit number.
What grit should you use to sand primer before paint?
Primer before paint is often sanded with medium-to-fine grits such as P320-P600, depending on whether the next step is more primer, sealer, single-stage paint, or base coat. The surface should be smooth enough for paint but still compatible with the coating system.

Block sanding primer surfacer helps level waves and reveal low spots. A guide coat is useful because it shows scratches, pinholes, and uneven sanding. If the guide coat remains in a low area, more blocking or repair may be needed before paint.
The related sanding block guide explains why blocks are important for primer straightness. For machine sanding larger primer areas, the related DA sander guide helps explain orbit, pressure, pad choice, and dust extraction.
Final grit depends on paint system guidance. Some base coats require a finer scratch than others. If the surface is too coarse, scratches can show. If it is too fine, adhesion may suffer.
Should primer be wet sanded or dry sanded?
Primer can be wet sanded or dry sanded, but dry sanding is common for primer surfacer because dust and guide coat make highs, lows, and scratches easier to read. Wet sanding can help with fine finishing, but it may hide some surface feedback.
Dry sanding with dust extraction is efficient and keeps the repair easy to inspect. It also avoids water getting into seams, filler, or porous areas when the process is not managed well. However, dry sanding creates dust, so extraction, ventilation, and PPE matter.
Wet sanding reduces airborne dust and can produce a very smooth surface, but slurry can hide scratches or low spots until the panel is cleaned. It also requires careful drying before the next coating step. The related wet sanding vs dry sanding guide gives a practical comparison for auto body work.
Major abrasive systems often pair primer sanding discs, sheets, blocks, and dust extraction because primer dust and loaded abrasives can create pigtails, heat, and uneven scratches 2.
What mistakes cause primer failure or visible scratches?
Primer problems often come from poor cleaning, wrong grit, insufficient cure, excessive film build, skipped grit steps, sanding through edges, or using incompatible products. Many visible paint defects begin before paint is sprayed.
Coarse scratches are a common issue. Primer may look like it filled them, but after cure, sanding, or topcoat shrinkage, the scratches can reappear. A proper grit progression matters.
Contamination is another major problem. Silicone, oil, wax, dust, or water can create fish eyes, adhesion issues, or surface defects. Cleaning should happen before sanding and before spraying.
Safety should not be ignored. Sanding primer and paint can create fine dust, and spraying coatings introduces additional hazards. OSHA’s autobody repair guidance covers sanding and refinishing concerns, including ventilation and respiratory protection 3.
What should buyers check before sourcing primer sanding abrasives?
Buyers should check grit consistency, clog resistance, scratch uniformity, backing strength, dust extraction performance, sheet or disc fit, packaging, and batch repeatability. Primer sanding exposes weak abrasives quickly because loaded paper and random deep scratches cause rework.
Sample testing should use real primer surfacer panels. Check how quickly the abrasive loads, whether it cuts cleanly after several passes, whether guide coat scratches are removed evenly, and whether the next grit can refine the surface. Also test wet/dry papers with water if they are marketed for wet sanding.
The automotive sandpaper and abrasives category is the Yirox starting point for sanding discs, sheets, and related abrasive products. Yirox Team sample checks usually focus on cut feel, scratch consistency, backing durability, packaging protection, label clarity, and whether repeat batches match approved samples.
For distributors, clear grit labeling and stable packaging are not small details. Primer sanding often moves through several grits, and a mislabeled abrasive can create scratches that only appear after paint.
Conclusion: Primer works only when the surface and sanding are right
Automotive primer prepares the vehicle for paint, but it does different jobs depending on the product. Epoxy primer protects and bonds, primer surfacer fills and levels, high-build primer helps blocking, sealer creates uniformity, and plastic primer improves adhesion on specific substrates.
The sanding plan matters as much as the primer. Use the right grit before primer, allow proper cure, block or machine sand carefully, and refine the surface enough for the next coating. For buyers, primer sanding abrasives should be consistent, clean-cutting, well packaged, and predictable across batches.
Frequently Asked Questions
Is automotive primer necessary before painting a car?
Primer is usually necessary when painting bare metal, filler, repaired areas, or surfaces that need adhesion, sealing, or leveling. Some existing finishes can be sanded and painted according to the coating system, but repair areas often need primer.
What is the difference between primer and primer surfacer?
Primer is a broad term for prep coatings. Primer surfacer is a type of primer designed to build film and be sanded smooth before paint.
Can you paint directly over primer?
Sometimes, but it depends on the primer type, cure window, surface condition, and paint system. Primer surfacer is usually sanded before paint, while some sealers are designed to be topcoated without sanding.
What grit should primer be sanded with before base coat?
Common final sanding ranges may fall around P400-P600 depending on the paint system. Always follow the coating manufacturer’s technical guidance for the specific product.
Why does primer clog sandpaper?
Primer can clog sandpaper if it is not cured, if the abrasive is too fine for the stage, if pressure is too high, or if dust extraction is poor. Fresh paper, correct grit, and proper cure time help reduce loading.
References
[1] PPG. *Automotive refinish primer and surfacer information*.
[2] 3M. *Automotive sanding and paint preparation systems*.
[3] OSHA. *Autobody repair and refinishing hazards*.