



Wheel weight removal should leave the rim clean, dry, and free of old adhesive before a replacement weight is installed. Use the correct removal method for the attachment type, avoid damaging the finish, remove residue completely, and rebalance the wheel-and-tire assembly before selecting the new correction location.
Removing an old weight is not just a cosmetic task. A remaining tape film, an oily cleaner, a scratched coating, or a replacement applied where the previous strip happened to sit can create a new adhesion or balance problem. The disciplined sequence is remove, inspect, clean, dry, rebalance, then install.
Table of Contents
- Why is wheel weight removal part of correct balancing?
- How should clip-on and adhesive wheel weights be removed?
- How should adhesive residue be removed from a rim?
- What must be checked before a new weight is installed?
- Why should the wheel be rebalanced after removal?
- What should buyers and service teams check before reinstallation?
- Conclusion: Prepare the surface, then correct the balance
- Frequently Asked Questions
- References
Why is wheel weight removal part of correct balancing?
Wheel weight removal matters because the old correction mass, its adhesive, and its location are all evidence—not a reusable instruction. The wheel may have been rebalanced after tire wear, a repair, a rotation, an impact, or a previous service. A sound wheel-weight selection and placement framework helps a technician separate the removal task from the new balancing decision.
An adhesive strip that is intact but no longer needed should not be left in place merely to avoid cleaning. Extra mass changes the assembly’s measured condition. Conversely, a missing strip or a clean rectangular shadow may indicate that the previous adhesive weight released; it does not prove what mass or position the wheel needs now. The balancer must determine the new correction after the tire-and-wheel assembly is mounted and measured.
Removal also protects the next bond. Pressure-sensitive tape performs against the surface it actually touches. Old foam, glue, brake dust, tire lubricant, silicone-containing products, and moisture can create a weak boundary layer. 3M’s wheel-weight guidance states that dust and fluids can adversely affect tape performance and calls for the application area to be cleaned before a new tape-attached weight is fitted.1
Use removal as a short inspection point. Look for coating damage, corrosion, distorted flanges, curb contact, and marks that show the former strip was bridging a ridge or sitting on an unsuitable texture. These observations may change the replacement format or the service process, but they should never substitute for a fresh balancing measurement.
How should clip-on and adhesive wheel weights be removed?
Clip-on and adhesive wheel weights require different removal methods because they are retained in different ways. A clip weight grips a rim flange, while an adhesive strip bonds to an inner-barrel landing surface. Treating both as something to pry off with a universal metal tool risks scratching the wheel or bending the flange.
For a clip-on weight, use the approved wheel-weight pliers or removal method for the relevant clip and rim. Support the tool squarely at the intended removal point and avoid levering against a finished alloy lip. Check the flange after removal for chipped coating, deformation, or a loss of coating that could affect fit or appearance. If the wheel finish is damaged, follow the wheel maker’s repair guidance rather than covering the problem with a new weight.
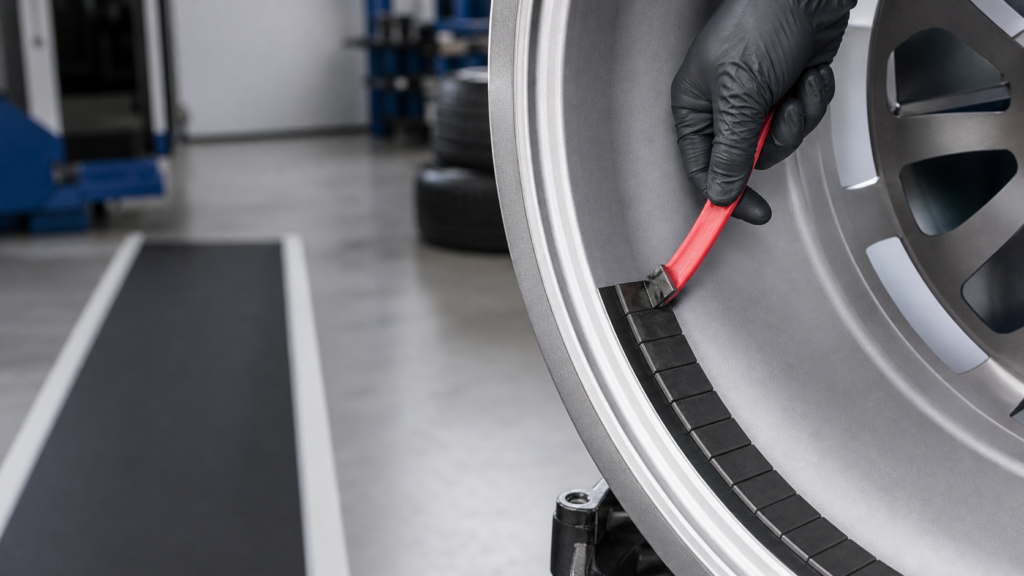
For an adhesive weight, start at a corner with a purpose-designed plastic removal tool. Lift the end gently, then peel the weight upward rather than dragging it sideways across the rim. 3M describes inserting a plastic removal tool between the tape and rim at a corner, then lifting the raised end at approximately 90 degrees while peeling the weight away.2 A plastic tool is less likely to mark the surface than an improvised metal scraper, though careful technique still matters.
The correct method can be summarized this way:
| Weight type | Primary removal concern | Good practice | Stop and inspect when |
|---|---|---|---|
| Clip-on | Flange damage or finish chipping | Use the approved plier method for the profile | The flange bends, paint flakes, or the clip is unusually tight |
| Adhesive | Marring the barrel or leaving tape behind | Lift a corner with a plastic tool and peel upward | The tape tears repeatedly, coating lifts, or residue is excessive |
| Unknown old weight | Misidentifying the retention method | Inspect the attachment before choosing a tool | The wheel design or weight style is unclear |
Do not heat, scrape, or use a solvent based on habit. Wheel paints, clearcoats, powder coatings, and refinished surfaces can react differently. Choose products compatible with the wheel’s finish and follow the chemical maker’s directions, ventilation requirements, and safety precautions. A removal process that is fast but damages a high-value alloy rim is not a successful process.
The choice between attachment systems also changes what service teams must stock. When planning clip-on vs. stick-on wheel weights for different wheel applications, include the right removal tools and surface-preparation materials in the operating plan—not only the correction weights.
How should adhesive residue be removed from a rim?
Adhesive residue should be removed completely with a finish-compatible process, followed by a final clean, dry wipe of the exact mounting lane. Leaving a thin sticky film is not harmless: it can attract dust, mix with a new cleaner, and keep the replacement tape from meeting the wheel surface uniformly.
First remove the weight body without pulling across the finish. Then assess what remains. A soft tape layer may roll or lift with an appropriate plastic tool and a compatible residue remover; stubborn material may need more dwell time and repeated gentle wiping rather than increased force. Keep liquids controlled so they do not run into areas where they are difficult to remove. Never let an aggressive tool become the default answer to a slow residue-removal step.
3M’s wheel-weight surface-prep instructions describe removing grease, oil, dirt, brake dust, and tape residue, then wiping away the loosened residue with a clean cloth.3 The important distinction is between dissolving or lifting old contamination and preparing the final bond area. After any removal product has done its job, the mounting lane must be left free of both old adhesive and cleaner residue.
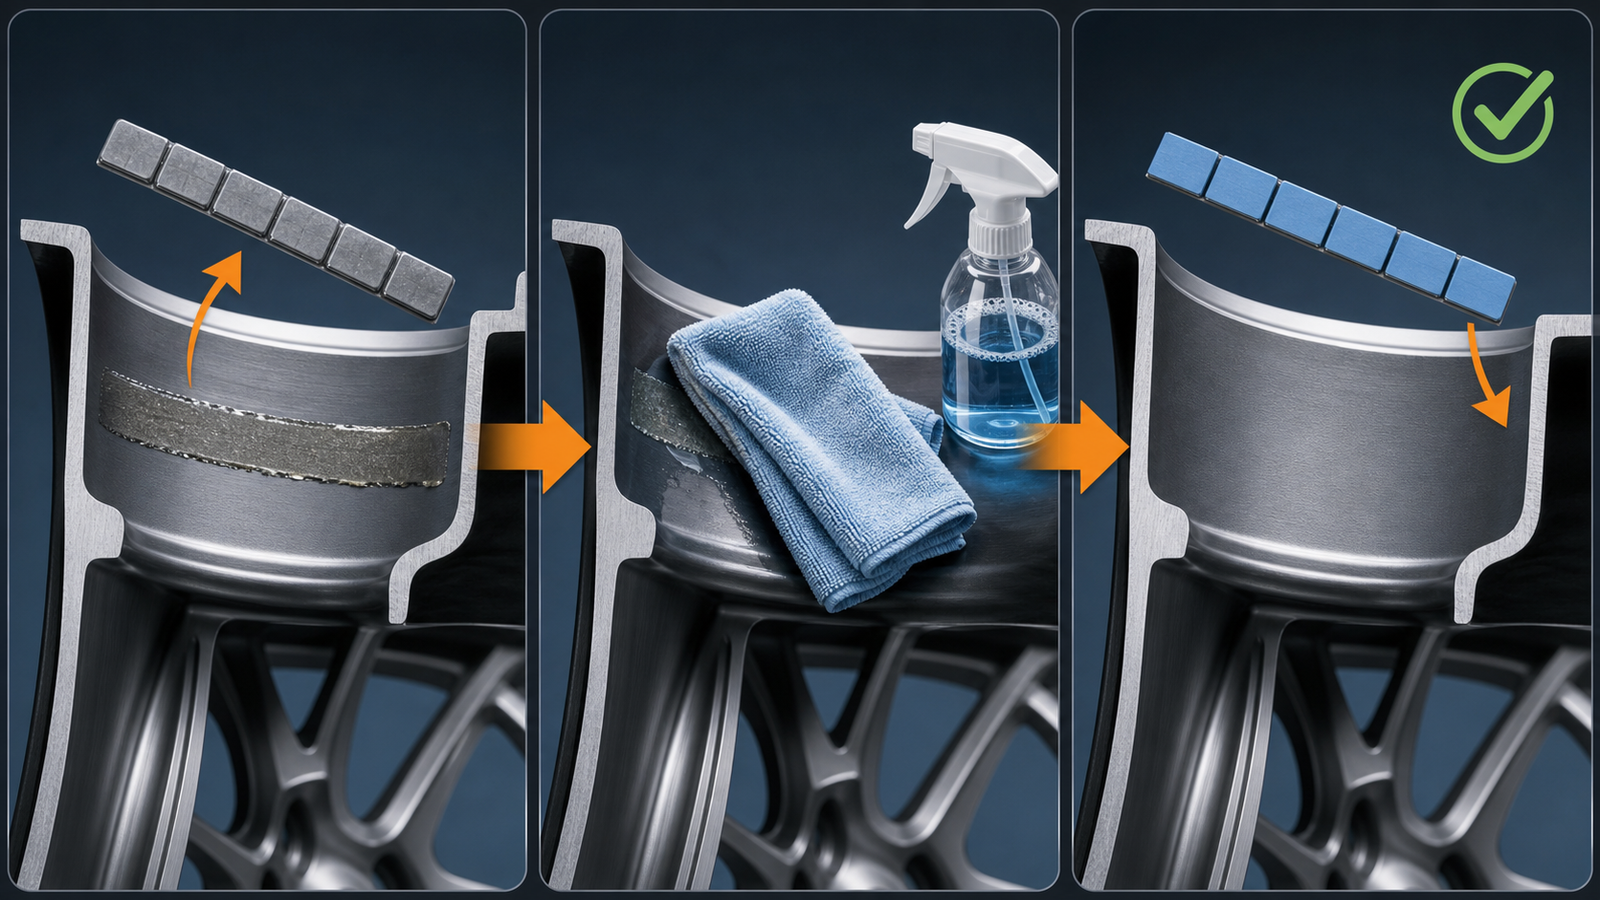
Use a simple inspection under good light before you install anything new. The landing surface should look continuous and dry, without a glossy oily patch, fibrous cloth residue, tacky edges, or a visible outline from the old strip. If the wheel has a textured casting area, a severe curve, or a ridge in the only convenient location, do not assume the same strip will fit correctly there. The next section covers the checks that prevent that shortcut.
What must be checked before a new weight is installed?
Before installing a new wheel weight, verify that the rim is clean and dry, the balancing location is appropriate, and the chosen format can sit flush on that location. Preparation is complete only when the new weight has a compatible surface and the balancer result tells the technician where the correction belongs.
Work through these checks in sequence:
- Inspect the finish. Confirm that the removal process did not expose loose coating, corrosion, or damage that needs separate attention.
- Clean the exact landing area. Do not clean an approximate zone and then relocate the strip to an unprepared section.
- Allow adequate drying. A solvent or water film can interfere with initial adhesion. Use the product instructions and local conditions rather than guessing a generic dwell time.
- Check geometry before peeling the liner. The strip should follow the barrel without bridging a ridge, recess, spoke transition, or abrupt radius change.
- Handle fresh tape carefully. Remove the release liner only when placement is ready, and avoid touching the exposed adhesive. This reduces transferred oil and debris.1
- Apply pressure across the whole strip. Align first, then press along the length according to the weight supplier’s procedure.
These steps do not mean every wheel must receive an adhesive strip. On some rims, an approved clip profile or a different balancing program may be the correct answer. The attachment choice should follow wheel design, clearance, finish requirements, and the authorized service method. It should not be chosen only because the previous weight used one format.
Why should the wheel be rebalanced after removal?
The wheel should be rebalanced after removal because an old weight’s mass and position reflect a previous measurement, not necessarily the assembly’s current imbalance. The tire can change relative to the rim during service, and the original correction may have been selected for a different balancing mode or placement plane.
Mount the complete wheel-and-tire assembly, enter the correct dimensions and balancing mode, and follow the balancer’s indicated correction locations. This prevents a common error: cleaning an old adhesive shadow and placing a new strip in the same spot before checking whether it is still needed. Buyers and service managers can use the explanation of how a wheel-and-tire assembly is rebalanced to train staff on the difference between a correction weight and the broader balancing process.
The recheck also catches a poor installation immediately. After applying the required correction, run the wheel again and confirm the machine’s result. If it requests a different location or a meaningful additional correction, investigate the program, dimensions, placement plane, and weight fit before sending the wheel out. A “zero” reading from the intended procedure is the useful completion signal, not the fact that a new strip looks straight.
What should buyers and service teams check before reinstallation?
Buyers and service teams should specify a repeatable removal-and-prep process alongside the weights themselves. A carton of adhesive strips cannot solve inconsistent cleaning, unsuitable rim geometry, unknown solvent compatibility, or a missing rebalancing step. The right standard makes service results more repeatable and helps investigate complaints with real evidence.
For an adhesive-weight program, request replacement adhesive-weight samples with the proposed strip sizes, segments, liner, and tape system. Test them on representative wheel finishes—not only on a flat coupon. Include wheels with curved barrels, textured areas, common coatings, and the workshop temperatures where the product will be used.
Where a new adhesive format is proposed, a buyer adhesion test plan helps confirm that the cleaned surface, temperature, pressure, and dwell time match the conditions the service team will actually use.
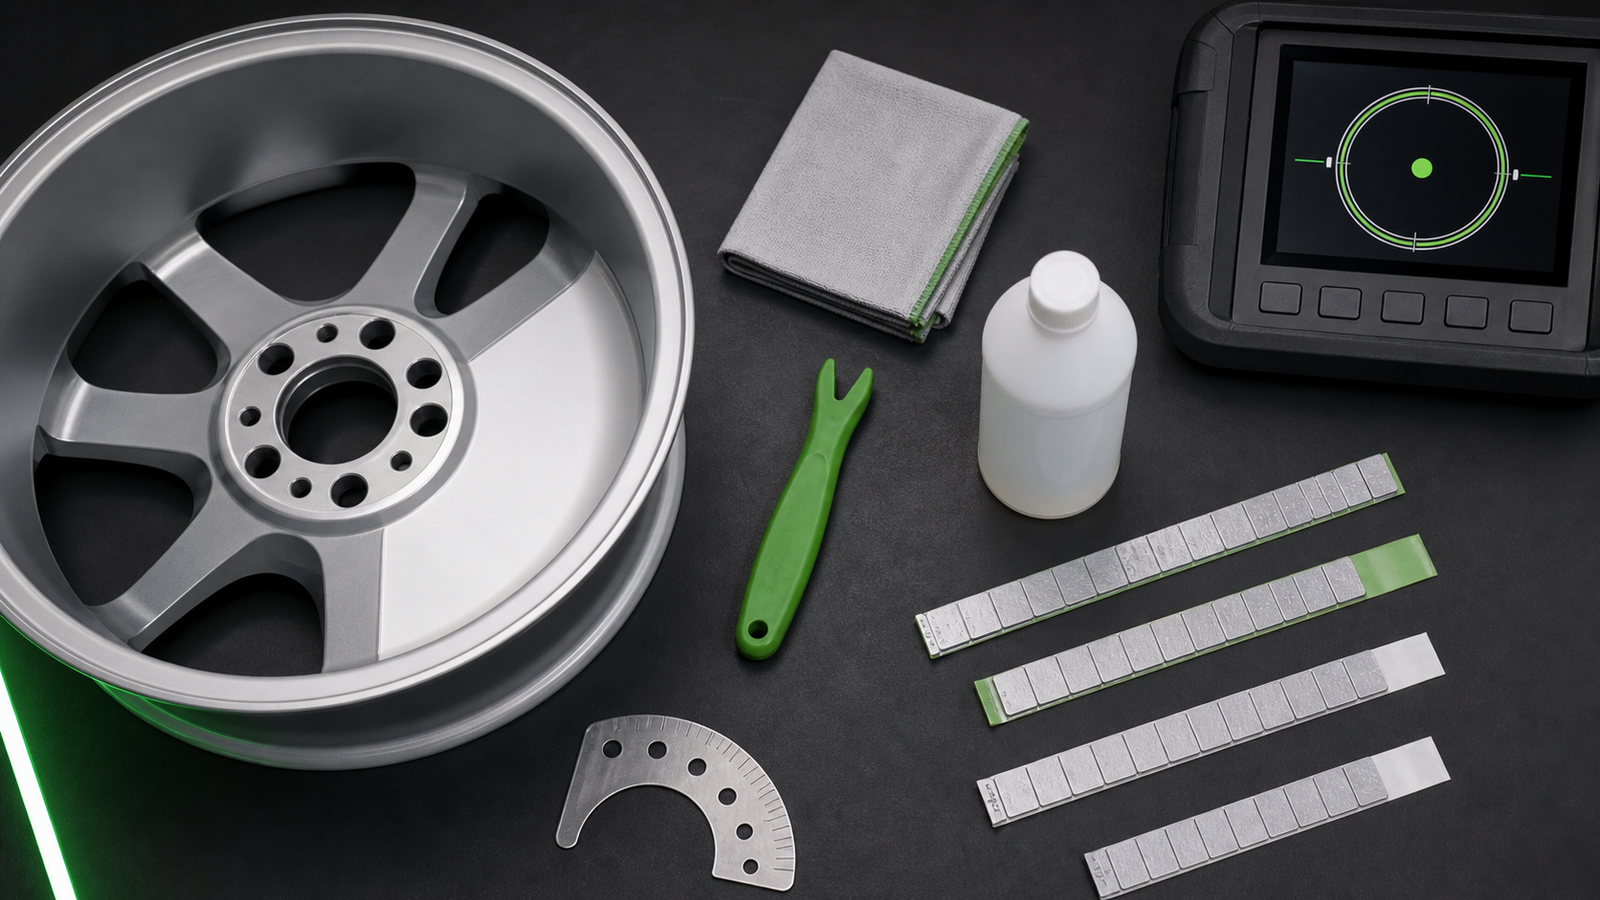
Build a compact operating checklist around the following questions:
- Which tool removes each supplied weight type without damaging common wheel finishes?
- Which cleaner is approved for residue removal, and what final wipe leaves the mounting area clean and dry?
- How is the correct landing surface checked for curvature, ridges, and clearance?
- When does the technician rebalance, and how is the final result recorded or verified?
- How are complaint samples, returned strips, and affected wheels identified for follow-up?
The procurement decision should cover the service system as well as the part. A workshop adding new adhesive formats can compare why adhesive weights detach after installation and request the relevant application guidance, samples, and packaging information. That creates a more dependable handoff from the buyer’s validation to normal technician work.
Conclusion: Prepare the surface, then correct the balance
Wheel weight removal is successful when it protects the rim, removes old adhesive and contaminants, and leaves a clean, dry landing surface for the next approved correction. Clip-on and adhesive weights should be removed with methods suited to their attachment systems; residue should be cleared without turning a surface-prep task into finish damage.
After removal, do not copy the old position. Rebalance the wheel-and-tire assembly, confirm the new location and format, then install the fresh weight with the required preparation and pressure. For a new service program or recurring adhesion complaint, request a rim-preparation and adhesive-application checklist alongside representative product samples.
Frequently Asked Questions
Can I reuse an adhesive wheel weight after removing it?
Generally, no. Once a tape-backed weight has been removed, its adhesive may have stretched, picked up contamination, or lost uniform contact. Use a fresh replacement weight after the rim has been properly prepared and the wheel has been rebalanced.
Will adhesive residue cause a new stick-on weight to fall off?
It can. Old tape residue, cleaner residue, brake dust, oil, and moisture can reduce the new tape’s contact with the actual rim finish. Remove residue completely, clean the specific mounting lane, and let it dry before installation.
Should I use a metal scraper to remove wheel-weight tape?
Avoid assuming a metal scraper is suitable, especially on painted or clear-coated alloy wheels. A purpose-designed plastic removal tool and a finish-compatible residue-removal process reduce the likelihood of marring. Follow the wheel and chemical manufacturer’s instructions for the specific surface.
Can I put the replacement weight where the old one was?
Only if a fresh balancing measurement and the selected balancing program call for that location. The old weight is evidence of a previous correction, not a fixed instruction for the wheel’s current condition.
What if removal lifts the wheel’s coating?
Stop the normal reinstallation process and assess the finish damage. A new adhesive strip may not bond reliably to loose or damaged coating, and covering the area does not resolve the underlying rim condition.
References
[1] 3M Wheel Weight System Application Guide. 3M, n.d. Accessed July 24, 2026.
[2] 3M Removal Tool PN99099. 3M, n.d. Accessed July 24, 2026.
[3] 3M Wheel Weight Surface Prep 2000, PN55453. 3M, n.d. Accessed July 24, 2026.