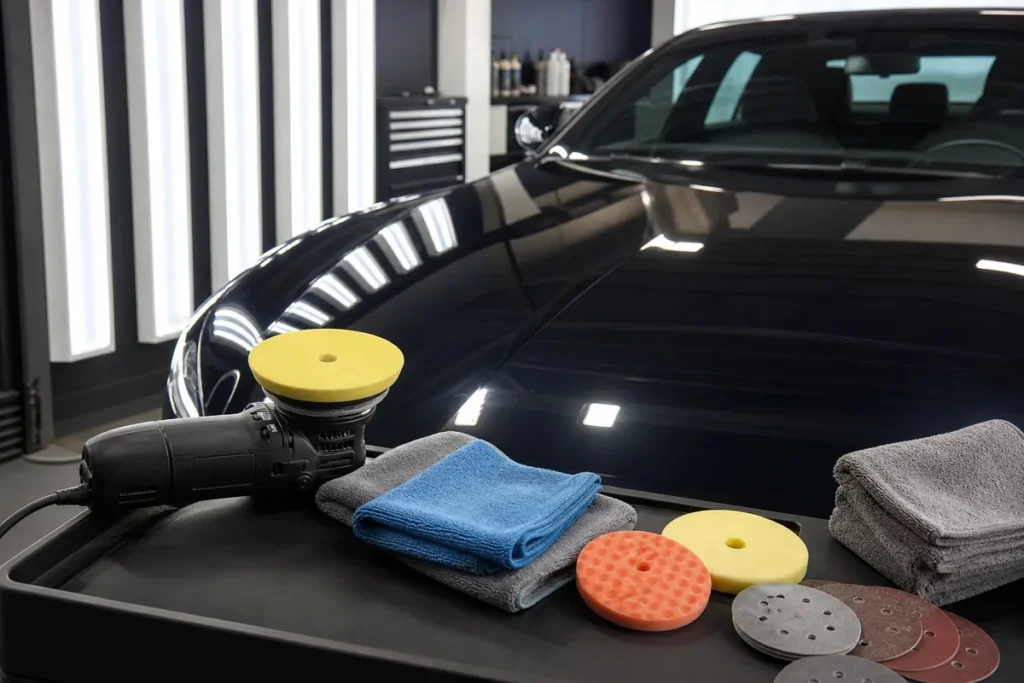
Paint correction is the controlled removal or refinement of defects in a vehicle’s paint, usually the clear coat, to restore gloss, clarity, and a more uniform reflection. It can involve polishing only, or it can include fine sanding and compounding when scratches, oxidation, orange peel, or texture defects are too deep for a light polish.
The phrase sounds simple, but the work depends on judgment. A correction job is not just “making paint shiny.” The technician has to understand paint thickness, defect depth, tool motion, abrasive grit, compound aggressiveness, pad choice, heat, dust, and what level of finish is realistic without removing too much clear coat.
This guide explains common paint correction types, the working process, and the abrasives used in automotive correction work. It also helps buyers and shop teams separate useful abrasive systems from products that cut fast at first but leave haze, pigtails, or inconsistent scratches.
Table of Contents
- What does paint correction mean on a car?
- What defects can paint correction fix?
- What are the main types of paint correction?
- How does the paint correction process work?
- What abrasives do you need for paint correction?
- How do you choose the right tools and pads?
- What mistakes can damage paint during correction?
- What should buyers check before sourcing paint correction abrasives?
- Conclusion: Paint correction is controlled clear coat refinement
- Frequently Asked Questions
- References
What does paint correction mean on a car?
Paint correction means using abrasives, compounds, polishes, pads, and machines to level or refine defects in the paint surface. Most modern correction work happens in the clear coat, so the goal is to improve the surface while preserving as much coating thickness as possible.
Clear coat defects scatter light. Swirl marks, sanding haze, oxidation, water spots, and random scratches all break up reflection. Correction improves the way light reflects by removing microscopic high spots around defects or refining rough sanding marks into a finer, glossier surface.
This is different from simply applying wax or glaze. A wax can protect and add temporary gloss. A glaze can hide some marks with oils or fillers. Paint correction physically changes the surface, which is why abrasive choice and technique matter so much.
Paint correction also has limits. If a scratch cuts through clear coat into base coat or primer, polishing cannot truly remove it. If clear coat is already thin, aggressive sanding or compounding can cause burn-through. Good correction starts with inspection, not with the strongest compound on the shelf.
What defects can paint correction fix?
Paint correction can improve swirl marks, light scratches, oxidation, sanding marks, water spot etching, paint transfer, light orange peel, and machine haze. It cannot safely fix every deep scratch, failed clear coat, severe cracking, or damage that has gone through the paint system.
Common correctable defects include wash-induced swirls, towel marks, holograms from rotary polishing, fine sanding marks after dust nib removal, and mild oxidation. These are surface-level problems in many cases. A controlled abrasive process can reduce them enough that the panel looks much clearer under inspection light.
Deeper defects require more caution. A fingernail-catching scratch may be too deep for full removal without taking away too much clear coat. A technician may improve its appearance rather than chase it completely. This is where honest evaluation protects both the vehicle and the customer.
Paint correction is often part of a broader surface preparation process. If the job includes primer sanding, defect removal, or repaint preparation, the related wet sanding vs dry sanding guide is a useful next step because water, slurry, dust extraction, and surface visibility change the sanding result.
What are the main types of paint correction?
The main paint correction types are one-step correction, multi-step correction, spot correction, wet sanding correction, and finishing refinement. The right type depends on defect depth, paint hardness, customer expectations, and how much clear coat can be safely removed.
| Correction Type | Typical Use | Abrasive Level | Main Risk |
|---|---|---|---|
| One-step correction | Light swirls and gloss improvement | Mild polish or all-in-one compound | May not remove deeper defects |
| Two-step correction | Moderate swirls and haze | Compound then polish | Too much cut if inspection is weak |
| Multi-step correction | Heavy defects or hard paint | Sanding or heavy compound plus refinement | Clear coat removal and heat |
| Spot correction | Isolated scratch or dust nib | Local sanding or compounding | Uneven texture or burn-through |
| Finishing polish | Haze removal and gloss refinement | Fine polish and soft pad | Hiding defects instead of correcting |
One-step correction is popular because it improves gloss quickly. It is not meant to chase every defect. It suits daily drivers, dealership preparation, or paint that only needs a mild refresh.
Two-step and multi-step correction provide more defect removal. A compound removes deeper marks, then a polish refines the haze left by the compound. More steps can improve clarity, but every abrasive step removes some material.
Wet sanding correction is more serious. It may be used for orange peel reduction, dust nibs, runs, or deeper localized defects. It requires fine grit control, clean water, proper backing, and careful polishing afterward. The related sandpaper grit chart helps explain why P1500, P2000, P3000, and finer steps are not interchangeable.
How does the paint correction process work?
Paint correction usually starts with washing, decontamination, inspection, a test spot, defect removal, polishing refinement, cleaning, and protection. The test spot is important because it proves the least aggressive method that gives the desired result.

The vehicle should be washed and decontaminated first. Dirt, iron particles, tar, and old residue can interfere with polishing and may create new scratches. A clean panel gives the abrasive system a fair chance to work.
Inspection comes next. Technicians use strong lighting to identify swirl marks, haze, sanding scratches, and deeper defects. Paint thickness readings may be needed before aggressive correction, especially on repainted panels, edges, and older vehicles.
A test spot then determines the process. Start mild, inspect the result, and increase cut only when needed. If a light polish removes enough defects, there is no reason to jump to heavy compound or sanding. If defects remain, move up carefully and plan the refinement step.
After correction, residue should be cleaned from the surface so the finish can be judged honestly. Oils can temporarily hide haze. Final protection, such as wax, sealant, or coating, does not replace correction, but it helps protect the corrected finish.
What abrasives do you need for paint correction?
Paint correction may use fine sandpaper, sanding discs, foam-backed abrasives, compounds, polishes, and finishing pads. The abrasive should become finer as the work moves from defect removal to gloss refinement.

For localized sanding, fine wet/dry paper or finishing discs are common. P1500 to P3000 may be used depending on the defect, paint system, and polishing capability. Finer sanding steps usually polish out more easily, but they must still remove the previous scratch. Skipping too far can leave deep scratches under a glossy surface.
For readers comparing abrasive formats, the related automotive sandpaper guide explains sheets, discs, wet/dry papers, backing types, and grit behavior. If the correction step uses a machine disc, the related sanding disc guide explains disc backing, hole patterns, and attachment styles.
Compounds use abrasive particles in a liquid or paste carrier. Some cut quickly and need a separate polish. Others are designed to cut and finish better in one step. Polishes use finer abrasives for clarity and gloss. Major paint finishing systems are built around matched abrasives, pads, and process steps because the final result depends on the full system, not one product alone 1.
How do you choose the right tools and pads?
Choose tools and pads by the correction goal, paint condition, panel shape, and operator skill. A dual-action polisher is forgiving for many jobs, while rotary tools and aggressive sanding require more control.
A DA polisher or DA sander spreads motion in a random orbital pattern, which helps reduce straight or circular marks. The related DA sander guide explains why orbit, pad size, speed, and pressure all affect the scratch pattern.
Foam pads are common for compounding and polishing. Cutting pads remove defects faster, polishing pads refine haze, and finishing pads maximize gloss. Microfiber pads can cut strongly but may haze some paints. Wool pads cut aggressively and are usually better suited to experienced operators.
Pad cleanliness matters. A loaded pad can scour the paint, run hot, or leave haze. Pads should be cleaned during work and changed when they stop performing. A strong abrasive on a dirty pad can create defects faster than it removes them.
What mistakes can damage paint during correction?
The most common paint correction mistakes are using too much cut, building heat, sanding through edges, skipping grit steps, working on dirty paint, and judging results under poor lighting. These mistakes can turn a correctable finish into a repaint problem.
Edges and body lines are high-risk areas because the coating is often thinner and the tool contact is concentrated. A DA tool is more forgiving than a rotary, but it can still burn through clear coat if pressure, speed, or abrasive choice is wrong.
Skipping grit steps is another problem. A fine polish may make deep sanding scratches look less visible, but it may not remove them. The finish can look acceptable indoors and then show marks in sunlight. Correction should be inspected under multiple lighting angles.
Dry sanding and compounding can also create dust and airborne residue. OSHA and NIOSH both treat sanding dust, ventilation, and respiratory protection as important concerns in autobody repair environments 3 4.
What should buyers check before sourcing paint correction abrasives?
Buyers should check cut consistency, scratch uniformity, backing quality, grit accuracy, pad compatibility, clog resistance, packaging, and batch repeatability. In correction work, a product that leaves random deep scratches can create expensive rework.
Sample testing should include real clear coat or refinishing panels, not only catalog claims. Test how quickly the abrasive cuts, whether it loads up, how easily the next step removes its scratch, and whether the final polish reaches the expected clarity. A disc or paper that feels sharp at first is not always the best correction product.
The automotive sandpaper and abrasives category is the practical Yirox starting point for sanding discs, sheets, and related abrasive products. Yirox Team sample checks usually focus on scratch consistency, backing strength, attachment quality, packaging protection, label clarity, and whether repeat batches match the approved sample.
For distributors and repair supply buyers, consistency is often more valuable than a dramatic first cut. Shops want predictable results because paint correction exposes mistakes under bright light.
Conclusion: Paint correction is controlled clear coat refinement
Paint correction removes or refines defects by using the right abrasive sequence, tool motion, pad choice, inspection method, and operator control. A mild one-step polish can improve gloss, while heavier correction may require compounding or fine sanding before refinement.
The safest process starts with clean paint, careful inspection, and a test spot. Use the least aggressive method that reaches the target result, then refine the finish until it is clear under proper lighting. For buyers, the best abrasive product is not simply the fastest cutter; it is the one that leaves a predictable scratch pattern the next step can remove.
Frequently Asked Questions
Is paint correction the same as polishing?
Polishing is one part of paint correction, but paint correction can also include compounding, fine sanding, defect inspection, and final refinement. A light polish may improve gloss without fully correcting deeper defects.
Does paint correction remove clear coat?
Yes, true paint correction removes a small amount of clear coat or refines its surface. That is why aggressive correction should be controlled and why edges, repainted panels, and thin paint need caution.
Can paint correction remove deep scratches?
It can improve many scratches, but it cannot safely remove every deep scratch. If the scratch is through the clear coat or into base coat, polishing cannot truly repair it.
What grit sandpaper is used before polishing?
Fine grits such as P1500, P2000, P3000, or finer may be used depending on the defect and polishing system. The correct choice depends on paint thickness, defect depth, and whether the next step can remove the sanding marks.
How long does paint correction last?
The corrected surface can last a long time if it is washed carefully and protected, but new wash marks can appear if maintenance is poor. Wax, sealant, or coating helps protect the corrected finish but does not make it scratch-proof.
References
[1] 3M. *Automotive paint finishing and abrasive systems*.
[2] Meguiar’s. *Paint defects, compounds, and polishing information*.
[3] OSHA. *Autobody repair and refinishing hazards*.
[4] NIOSH. *Control of dusts from sanding in autobody repair*.