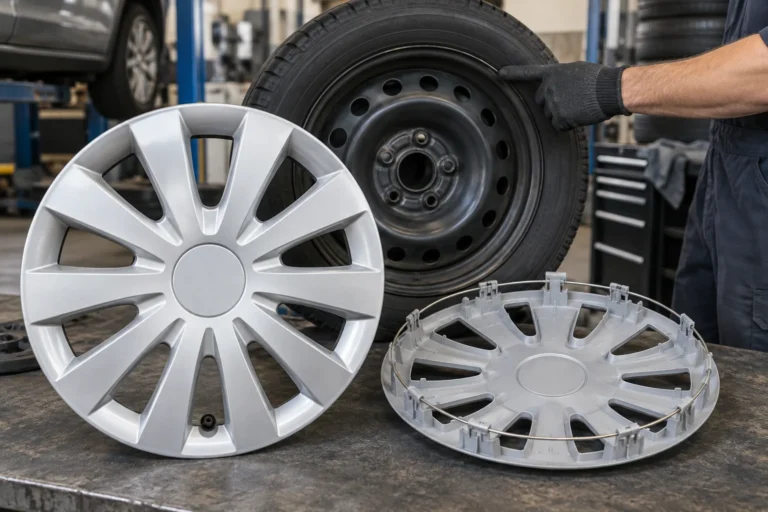




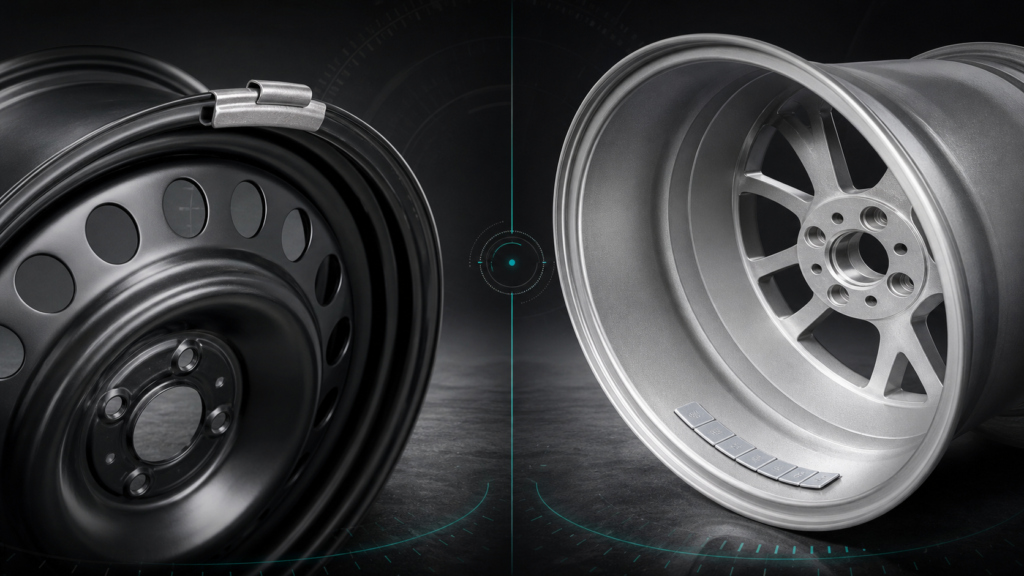
Clip-on wheel weights attach to the rim flange, while adhesive wheel weights attach inside the wheel barrel. Choose clip-on weights for flange retention and fast service; choose adhesive weights when alloy-wheel appearance, clearance, and surface protection matter. Adhesive weights are also commonly called stick-on weights.
That is the core choice, but the correct product still depends on the wheel construction, approved attachment location, finish, service workflow, and target market. This guide keeps the comparison practical: how the two formats fit, where installation failures happen, and what to confirm before standardizing a range.
For a broader explanation of materials, sizes, and wheel-weight categories, use the clip-on vs adhesive wheel weight guide as the parent reference. This page stays focused on the attachment-method decision.
Table of Contents
- What are clip-on and adhesive wheel weights?
- How do clip-on and adhesive wheel weights compare?
- Which wheel type fits each attachment method?
- What installation and failure risks should you compare?
- How do you choose between clip-on and adhesive wheel weights?
- What should buyers include in a wheel-weight RFQ?
- Conclusion: Choose the attachment method around the wheel
- Frequently Asked Questions
- References
What are clip-on and adhesive wheel weights?
Clip-on wheel weights use a spring clip to engage a suitable rim flange. Adhesive wheel weights use a backed strip or segment that bonds to a clean surface inside the wheel barrel. Both formats correct wheel-and-tire imbalance; the difference is how the correction mass is retained.
The balancer determines the required correction mass and position. It does not make an incompatible clip fit, and it does not compensate for a poorly prepared adhesive surface. Attachment method, wheel geometry, and installation quality have to agree.
Clip-on weights are often practical when the wheel provides an approved flange location and the service team values quick installation. Adhesive weights are often practical when the wheel has a visible or delicate finish, limited flange access, or an inner-barrel location that gives the required correction without placing a weight on the outer rim edge.
The terms “adhesive” and “stick-on” describe the same broad format, but “adhesive” is the clearer term for product specifications. A buyer should still recognize “stick-on” because workshops and catalogues use both phrases.
How do clip-on and adhesive wheel weights compare?
Clip-on weights prioritize mechanical retention and fast flange installation. Adhesive weights prioritize a concealed mounting position, finish protection, and flexibility when a suitable clip-on location is unavailable.
| Selection factor | Clip-on wheel weights | Adhesive wheel weights |
|---|---|---|
| Attachment point | Rim flange or approved clip-on location | Clean surface inside the wheel barrel |
| Typical fit | Many steel wheels and selected commercial applications | Many alloy, cosmetic, and clearance-sensitive applications |
| Main benefit | Fast service and mechanical retention | Cleaner appearance and flexible placement |
| Main risk | Wrong profile, poor seating, or finish damage | Contamination, low bond strength, or insufficient clearance |
| What must be verified | Flange geometry, profile, coating, and installation tool | Surface preparation, tape, temperature guidance, and barrel clearance |
| Service workflow | Usually quick to install when the profile is already approved | Requires careful cleaning and accurate placement |
Clip-on is not automatically the professional choice, and adhesive is not automatically the premium choice. The correct format is the one that matches the wheel’s approved attachment location and the service conditions. A low-cost weight that cannot retain correctly is not a low-cost solution after returns and rework are counted.
For clip-on products, do not treat P, C, T, or MC as universal vehicle codes. They are useful profile-family labels, but the actual flange, coating, and supplier drawing decide fitment. The clip profile fitment guide explains why a sample fit matters more than a code alone.
For adhesive products, the metal weight is only one part of the system. Tape type, backing-liner condition, strip flexibility, surface preparation, and packaging protection all affect whether the weight stays attached after installation.
Which wheel type fits each attachment method?
Steel wheels commonly favor clip-on weights, while alloy wheels often favor adhesive weights, but neither rule is universal. The wheel’s approved location, flange design, visible finish, available clearance, and balancing procedure should decide the format.
Steel wheels
Steel wheels often expose a usable rim flange, so clip-on weights can provide a fast and repeatable workshop solution. The main checks are flange thickness, lip shape, profile seating, coating, and retention. A steel wheel program should not assume that one clip profile fits every regional or vehicle-specific rim.
Adhesive weights can still be useful on steel wheels when the wheel has a non-standard flange, a protected finish, or an inner-barrel balancing position. The choice should follow the approved service location rather than the material name alone.
Alloy wheels
Alloy wheels frequently use adhesive weights because the visible rim finish matters and an unsuitable clip can scratch, mark, or fail to seat on the flange. An inner-barrel adhesive position can also keep the correction mass out of sight.
Some alloy wheels have approved clip-on locations and require a specific coated profile. In that case, a coated clip may be correct, while a generic clip may not be. Confirm the wheel guidance, profile, finish contact, and clearance before treating a clip-on weight as interchangeable with an adhesive one.
Trucks and commercial vehicles
Truck and commercial wheel programs can use clip-on or adhesive formats depending on wheel construction, axle position, service practice, and the correction range required by the assembly. Larger vehicles do not automatically require a different attachment method.
For a fleet or distributor program, specify the actual vehicle and wheel applications first. Then confirm clip retention, adhesive environment, package handling, and the service tools used by the customer. If the market includes both steel commercial wheels and aluminum wheels, a mixed format may be more realistic than forcing every application into one product type.
EVs and premium passenger vehicles
EVs do not require a separate wheel-weight technology, but they often increase expectations around low vibration, clean appearance, corrosion resistance, and lead-free positioning. Alloy wheels, larger wheel diameters, and premium finishes make adhesive or specially coated options common starting points.
The practical question is not whether a wheel belongs to an EV. It is whether the selected weight fits the wheel, remains secure in the intended position, and meets the customer’s material and appearance requirements.
What installation and failure risks should you compare?
Clip-on failures usually begin with a mismatch between the clip profile and the rim flange. Adhesive failures usually begin with contamination, unsuitable application conditions, incorrect placement, or a tape system that was never validated for the real wheel surface.
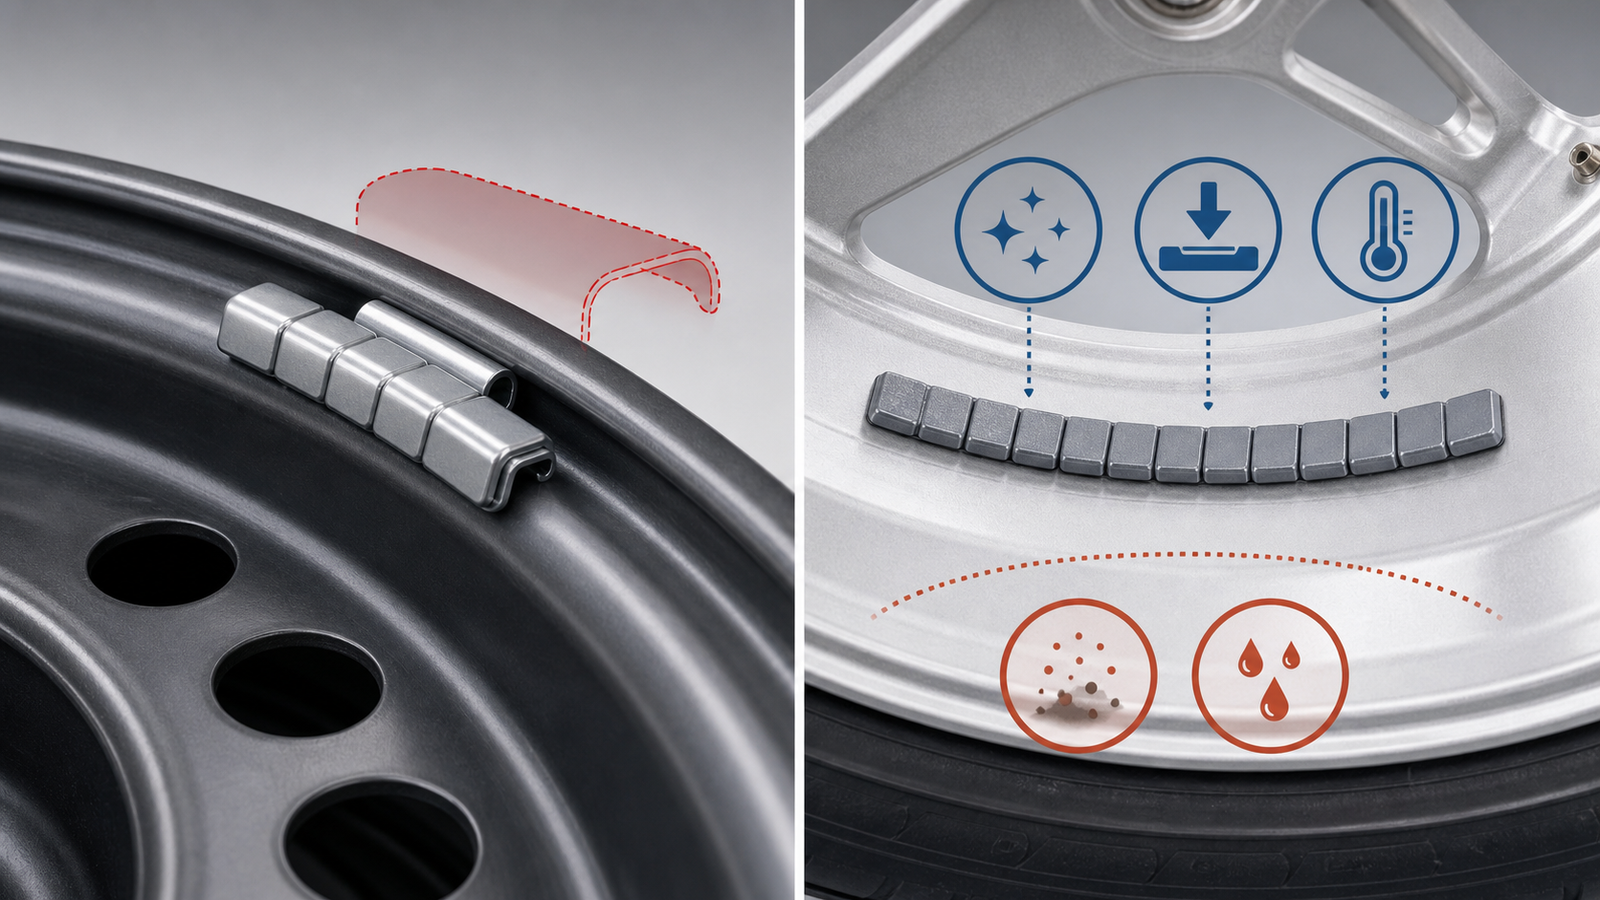
For clip-on installation, the technician should:
- Confirm the approved mounting location and inspect the flange.
- Check the candidate profile against the flange instead of copying an old weight blindly.
- Use the appropriate installation tool and seat the clip without forcing it.
- Check that the weight is stable, clear of adjacent components, and not damaging the finish.
A clip that is too loose can move or detach. A clip that is too tight can damage a coating or deform during installation. Corrosion, heavy paint, bent flange edges, or a decorative lip can also change the result.
For adhesive installation, the technician should:
- Confirm the inner-barrel location and required correction plane.
- Remove dust, oil, brake residue, moisture, and other contamination.
- Follow the tape supplier’s surface-preparation and application guidance 1.
- Apply the strip evenly, press it correctly, and confirm clearance before service.
Adhesive weights can fall off when the surface is dirty, wet, too cold for the tape system, or exposed to pressure washing before the bond has developed. The product should be packaged so that dust and moisture do not contaminate the adhesive before installation.
The failure mode matters commercially. A clip-on complaint often points to profile selection or tool use. An adhesive complaint may point to tape, cleaning, storage, packaging, or installation conditions. A buyer should investigate the complete system instead of changing only the metal material.
How do you choose between clip-on and adhesive wheel weights?
Use a five-step selection process. Start with the actual wheel and approved mounting location, then validate the product on a representative sample before comparing price or expanding the range.
- Identify the wheel: Confirm whether it is steel, alloy, or a specially finished wheel. Record visible finish, coating, and any customer restrictions.
- Identify the attachment location: Decide whether the correction belongs on the rim flange or inside the wheel barrel. Do not select the product before this interface is clear.
- Confirm the fitment interface: For clip-on products, confirm the specific profile and compare it with the flange. P, C, T, and MC labels can identify candidates, but they do not replace a profile drawing or physical fit check.
- Confirm the adhesive conditions: For adhesive products, check inner-barrel clearance, surface cleanliness, application temperature guidance, tape requirements, and storage conditions.
- Approve a real sample: Test installation, seating, retention, finish contact, packaging labels, and the proposed SKU on representative wheels before standardizing the range.
This sequence prevents a common purchasing mistake: choosing the weight size first and discovering later that the attachment method is wrong. Size and increments still matter, but only after the wheel interface has been validated. For the next step, use the wheel weight size and increment chart to define the mass system your market actually uses.
What should buyers include in a wheel-weight RFQ?
A useful RFQ should describe the wheel application and attachment conditions, not just ask for a unit price. Include these eight fields so different suppliers quote the same product scope:
- Wheel type and finish: Steel, alloy, painted, plated, polished, or another surface treatment.
- Vehicle application: Passenger car, SUV, truck, commercial vehicle, or EV.
- Clip profile or inner-barrel clearance: Provide the profile reference and flange information, or the available adhesive mounting space.
- Material and coating: State the preferred material, finish, corrosion expectation, and any lead-free requirement.
- Gram/ounce system and increments: Define the market’s unit system and required correction increments. Avoid importing a full size range without demand evidence.
- Adhesive tape or retention requirements: Specify tape expectations, clip strength, coating contact, installation tools, and sample-test conditions.
- Packaging and labeling: Confirm strip layout, inner-box count, carton labels, SKU separation, instructions, and private-label requirements.
- Target market, quantity, and documents: State destination, initial quantity, expected repeat volume, material declarations, and other documents the customer actually needs.
Lead-free requirements should be confirmed against the destination market and customer channel. The EPA lead wheel-weight guidance and EU End-of-Life Vehicles framework are useful starting points, but neither replaces a market-specific compliance review.
Keep the RFQ focused on the decision this page covers. Detailed inventory depth belongs in wheel-weight SKU range planning, while broad material and compliance context belongs in the parent wheel-balance guide. That separation keeps the article useful without turning it into another generic catalogue page.
For a mixed service market, ask for representative clip-on and adhesive samples rather than ordering every profile or strip format immediately. Review fitment, retention, finish, tape condition, labels, and carton handling together. A smaller validated range is usually more useful than a large untested list.
For clip-on installation, the technician should:
- Confirm the approved mounting location and inspect the flange.
- Check the candidate profile against the flange instead of copying an old weight blindly.
- Use the appropriate installation tool and seat the clip without forcing it.
- Check that the weight is stable, clear of adjacent components, and not damaging the finish.
A clip that is too loose can move or detach. A clip that is too tight can damage a coating or deform during installation. Corrosion, heavy paint, bent flange edges, or a decorative lip can also change the result.
For adhesive installation, the technician should:
- Confirm the inner-barrel location and required correction plane.
- Remove dust, oil, brake residue, moisture, and other contamination.
- Follow the tape supplier’s surface-preparation and application guidance 1.
- Apply the strip evenly, press it correctly, and confirm clearance before service.
Adhesive weights can fall off when the surface is dirty, wet, too cold for the tape system, or exposed to pressure washing before the bond has developed. The product should be packaged so that dust and moisture do not contaminate the adhesive before installation.
The failure mode matters commercially. A clip-on complaint often points to profile selection or tool use. An adhesive complaint may point to tape, cleaning, storage, packaging, or installation conditions. A buyer should investigate the complete system instead of changing only the metal material.
How do you choose between clip-on and adhesive wheel weights?
Use a five-step selection process. Start with the actual wheel and approved mounting location, then validate the product on a representative sample before comparing price or expanding the range.
- Identify the wheel: Confirm whether it is steel, alloy, or a specially finished wheel. Record visible finish, coating, and any customer restrictions.
- Identify the attachment location: Decide whether the correction belongs on the rim flange or inside the wheel barrel. Do not select the product before this interface is clear.
- Confirm the fitment interface: For clip-on products, confirm the specific profile and compare it with the flange. P, C, T, and MC labels can identify candidates, but they do not replace a profile drawing or physical fit check.
- Confirm the adhesive conditions: For adhesive products, check inner-barrel clearance, surface cleanliness, application temperature guidance, tape requirements, and storage conditions.
- Approve a real sample: Test installation, seating, retention, finish contact, packaging labels, and the proposed SKU on representative wheels before standardizing the range.
This sequence prevents a common purchasing mistake: choosing the weight size first and discovering later that the attachment method is wrong. Size and increments still matter, but only after the wheel interface has been validated. For the next step, use the wheel weight size and increment chart to define the mass system your market actually uses.
What should buyers include in a wheel-weight RFQ?
A useful RFQ should describe the wheel application and attachment conditions, not just ask for a unit price. Include these eight fields so different suppliers quote the same product scope:
- Wheel type and finish: Steel, alloy, painted, plated, polished, or another surface treatment.
- Vehicle application: Passenger car, SUV, truck, commercial vehicle, or EV.
- Clip profile or inner-barrel clearance: Provide the profile reference and flange information, or the available adhesive mounting space.
- Material and coating: State the preferred material, finish, corrosion expectation, and any lead-free requirement.
- Gram/ounce system and increments: Define the market’s unit system and required correction increments. Avoid importing a full size range without demand evidence.
- Adhesive tape or retention requirements: Specify tape expectations, clip strength, coating contact, installation tools, and sample-test conditions.
- Packaging and labeling: Confirm strip layout, inner-box count, carton labels, SKU separation, instructions, and private-label requirements.
- Target market, quantity, and documents: State destination, initial quantity, expected repeat volume, material declarations, and other documents the customer actually needs.
Lead-free requirements should be confirmed against the destination market and customer channel. The EPA lead wheel-weight guidance and EU End-of-Life Vehicles framework are useful starting points, but neither replaces a market-specific compliance review.
Keep the RFQ focused on the decision this page covers. Detailed inventory depth belongs in wheel-weight SKU range planning, while broad material and compliance context belongs in the parent wheel-balance guide. That separation keeps the article useful without turning it into another generic catalogue page.
For a mixed service market, ask for representative clip-on and adhesive samples rather than ordering every profile or strip format immediately. Review fitment, retention, finish, tape condition, labels, and carton handling together. A smaller validated range is usually more useful than a large untested list.
For clip-on installation, the technician should:
- Confirm the approved mounting location and inspect the flange.
- Check the candidate profile against the flange instead of copying an old weight blindly.
- Use the appropriate installation tool and seat the clip without forcing it.
- Check that the weight is stable, clear of adjacent components, and not damaging the finish.
A clip that is too loose can move or detach. A clip that is too tight can damage a coating or deform during installation. Corrosion, heavy paint, bent flange edges, or a decorative lip can also change the result.
For adhesive installation, the technician should:
- Confirm the inner-barrel location and required correction plane.
- Remove dust, oil, brake residue, moisture, and other contamination.
- Follow the tape supplier’s surface-preparation and application guidance 1.
- Apply the strip evenly, press it correctly, and confirm clearance before service.
Adhesive weights can fall off when the surface is dirty, wet, too cold for the tape system, or exposed to pressure washing before the bond has developed. The product should be packaged so that dust and moisture do not contaminate the adhesive before installation.
The failure mode matters commercially. A clip-on complaint often points to profile selection or tool use. An adhesive complaint may point to tape, cleaning, storage, packaging, or installation conditions. A buyer should investigate the complete system instead of changing only the metal material.
How do you choose between clip-on and adhesive wheel weights?
Use a five-step selection process. Start with the actual wheel and approved mounting location, then validate the product on a representative sample before comparing price or expanding the range.
- Identify the wheel: Confirm whether it is steel, alloy, or a specially finished wheel. Record visible finish, coating, and any customer restrictions.
- Identify the attachment location: Decide whether the correction belongs on the rim flange or inside the wheel barrel. Do not select the product before this interface is clear.
- Confirm the fitment interface: For clip-on products, confirm the specific profile and compare it with the flange. P, C, T, and MC labels can identify candidates, but they do not replace a profile drawing or physical fit check.
- Confirm the adhesive conditions: For adhesive products, check inner-barrel clearance, surface cleanliness, application temperature guidance, tape requirements, and storage conditions.
- Approve a real sample: Test installation, seating, retention, finish contact, packaging labels, and the proposed SKU on representative wheels before standardizing the range.
This sequence prevents a common purchasing mistake: choosing the weight size first and discovering later that the attachment method is wrong. Size and increments still matter, but only after the wheel interface has been validated. For the next step, use the wheel weight size and increment chart to define the mass system your market actually uses.
What should buyers include in a wheel-weight RFQ?
A useful RFQ should describe the wheel application and attachment conditions, not just ask for a unit price. Include these eight fields so different suppliers quote the same product scope:
- Wheel type and finish: Steel, alloy, painted, plated, polished, or another surface treatment.
- Vehicle application: Passenger car, SUV, truck, commercial vehicle, or EV.
- Clip profile or inner-barrel clearance: Provide the profile reference and flange information, or the available adhesive mounting space.
- Material and coating: State the preferred material, finish, corrosion expectation, and any lead-free requirement.
- Gram/ounce system and increments: Define the market’s unit system and required correction increments. Avoid importing a full size range without demand evidence.
- Adhesive tape or retention requirements: Specify tape expectations, clip strength, coating contact, installation tools, and sample-test conditions.
- Packaging and labeling: Confirm strip layout, inner-box count, carton labels, SKU separation, instructions, and private-label requirements.
- Target market, quantity, and documents: State destination, initial quantity, expected repeat volume, material declarations, and other documents the customer actually needs.
Lead-free requirements should be confirmed against the destination market and customer channel. The EPA lead wheel-weight guidance and EU End-of-Life Vehicles framework are useful starting points, but neither replaces a market-specific compliance review.
Keep the RFQ focused on the decision this page covers. Detailed inventory depth belongs in wheel-weight SKU range planning, while broad material and compliance context belongs in the parent wheel-balance guide. That separation keeps the article useful without turning it into another generic catalogue page.
For a mixed service market, ask for representative clip-on and adhesive samples rather than ordering every profile or strip format immediately. Review fitment, retention, finish, tape condition, labels, and carton handling together. A smaller validated range is usually more useful than a large untested list.
For clip-on installation, the technician should:
- Confirm the approved mounting location and inspect the flange.
- Check the candidate profile against the flange instead of copying an old weight blindly.
- Use the appropriate installation tool and seat the clip without forcing it.
- Check that the weight is stable, clear of adjacent components, and not damaging the finish.
A clip that is too loose can move or detach. A clip that is too tight can damage a coating or deform during installation. Corrosion, heavy paint, bent flange edges, or a decorative lip can also change the result.
For adhesive installation, the technician should:
- Confirm the inner-barrel location and required correction plane.
- Remove dust, oil, brake residue, moisture, and other contamination.
- Follow the tape supplier’s surface-preparation and application guidance 1.
- Apply the strip evenly, press it correctly, and confirm clearance before service.
Adhesive weights can fall off when the surface is dirty, wet, too cold for the tape system, or exposed to pressure washing before the bond has developed. The product should be packaged so that dust and moisture do not contaminate the adhesive before installation.
The failure mode matters commercially. A clip-on complaint often points to profile selection or tool use. An adhesive complaint may point to tape, cleaning, storage, packaging, or installation conditions. A buyer should investigate the complete system instead of changing only the metal material.
How do you choose between clip-on and adhesive wheel weights?
Use a five-step selection process. Start with the actual wheel and approved mounting location, then validate the product on a representative sample before comparing price or expanding the range.
- Identify the wheel: Confirm whether it is steel, alloy, or a specially finished wheel. Record visible finish, coating, and any customer restrictions.
- Identify the attachment location: Decide whether the correction belongs on the rim flange or inside the wheel barrel. Do not select the product before this interface is clear.
- Confirm the fitment interface: For clip-on products, confirm the specific profile and compare it with the flange. P, C, T, and MC labels can identify candidates, but they do not replace a profile drawing or physical fit check.
- Confirm the adhesive conditions: For adhesive products, check inner-barrel clearance, surface cleanliness, application temperature guidance, tape requirements, and storage conditions.
- Approve a real sample: Test installation, seating, retention, finish contact, packaging labels, and the proposed SKU on representative wheels before standardizing the range.
This sequence prevents a common purchasing mistake: choosing the weight size first and discovering later that the attachment method is wrong. Size and increments still matter, but only after the wheel interface has been validated. For the next step, use the wheel weight size and increment chart to define the mass system your market actually uses.
What should buyers include in a wheel-weight RFQ?
A useful RFQ should describe the wheel application and attachment conditions, not just ask for a unit price. Include these eight fields so different suppliers quote the same product scope:
- Wheel type and finish: Steel, alloy, painted, plated, polished, or another surface treatment.
- Vehicle application: Passenger car, SUV, truck, commercial vehicle, or EV.
- Clip profile or inner-barrel clearance: Provide the profile reference and flange information, or the available adhesive mounting space.
- Material and coating: State the preferred material, finish, corrosion expectation, and any lead-free requirement.
- Gram/ounce system and increments: Define the market’s unit system and required correction increments. Avoid importing a full size range without demand evidence.
- Adhesive tape or retention requirements: Specify tape expectations, clip strength, coating contact, installation tools, and sample-test conditions.
- Packaging and labeling: Confirm strip layout, inner-box count, carton labels, SKU separation, instructions, and private-label requirements.
- Target market, quantity, and documents: State destination, initial quantity, expected repeat volume, material declarations, and other documents the customer actually needs.
Lead-free requirements should be confirmed against the destination market and customer channel. The EPA lead wheel-weight guidance and EU End-of-Life Vehicles framework are useful starting points, but neither replaces a market-specific compliance review.
Keep the RFQ focused on the decision this page covers. Detailed inventory depth belongs in wheel-weight SKU range planning, while broad material and compliance context belongs in the parent wheel-balance guide. That separation keeps the article useful without turning it into another generic catalogue page.
For a mixed service market, ask for representative clip-on and adhesive samples rather than ordering every profile or strip format immediately. Review fitment, retention, finish, tape condition, labels, and carton handling together. A smaller validated range is usually more useful than a large untested list.
For clip-on installation, the technician should confirm that the flange is the intended profile, position the weight accurately, and use a suitable tool to secure it. Forcing the wrong clip onto the wheel can damage the coating, distort the clip, or create too little holding force.
For stick-on installation, the technician should remove old residue, clean the barrel, let the surface dry, and press the strip firmly. Cold weather, wet wheels, brake dust, tire dressing residue, and rushed installation can all compromise adhesive contact. Some shops also need to consider clearance to brake components or spoke design when selecting the exact placement.
Failure prevention belongs in the product program as well as the installation procedure. Clip-on buyers should verify flange fit across representative wheels. Adhesive-weight buyers should test tape performance on cleaned and real-world wheel surfaces, not only on a laboratory sample panel.
How do cost, appearance, and service speed compare?
Clip-on weights often win on straightforward mechanical installation, while stick-on weights often win on appearance and flange protection. The true cost comparison should include field failures, customer expectations, rework time, and the number of SKUs needed to cover the market, not only the cost per gram.
Clip-on weights can be quick to select and hammer on when a shop works with a familiar set of steel-wheel profiles. That speed can be valuable for high-throughput service. The trade-off is that the weight may remain visible and the wrong clip can damage a finished rim.
Stick-on weights often need a few extra seconds of cleaning and pressing, but they create a cleaner exterior result on alloy wheels. Their cost should be considered alongside adhesive quality and packaging. A low-cost strip that falls off after a wash, cold spell, or dusty installation can cost more in complaints and rebalancing than a stronger tape option.
For global buyers, material choice also affects the calculation. Steel and zinc are common lead-free alternatives, and the market requirements for lead can vary by destination and customer supply chain. The EPA identifies environmental concerns around lost lead wheel weights, while EU vehicle rules address restricted hazardous substances and exemptions that should be checked for the relevant application 2 3.
Once attachment is fixed, material trade-offs after the attachment method is fixed help a buyer evaluate density, finish, and destination expectations without confusing them with rim fit.
What should buyers stock for a mixed wheel market?
Buyers in mixed wheel markets should stock both clip-on and stick-on weights, then adjust the SKU depth to the local mix of steel wheels, alloy wheels, passenger vehicles, trucks, and service habits. A broad but poorly matched range can tie up inventory, while a narrow range can leave shops unable to finish common balancing jobs.
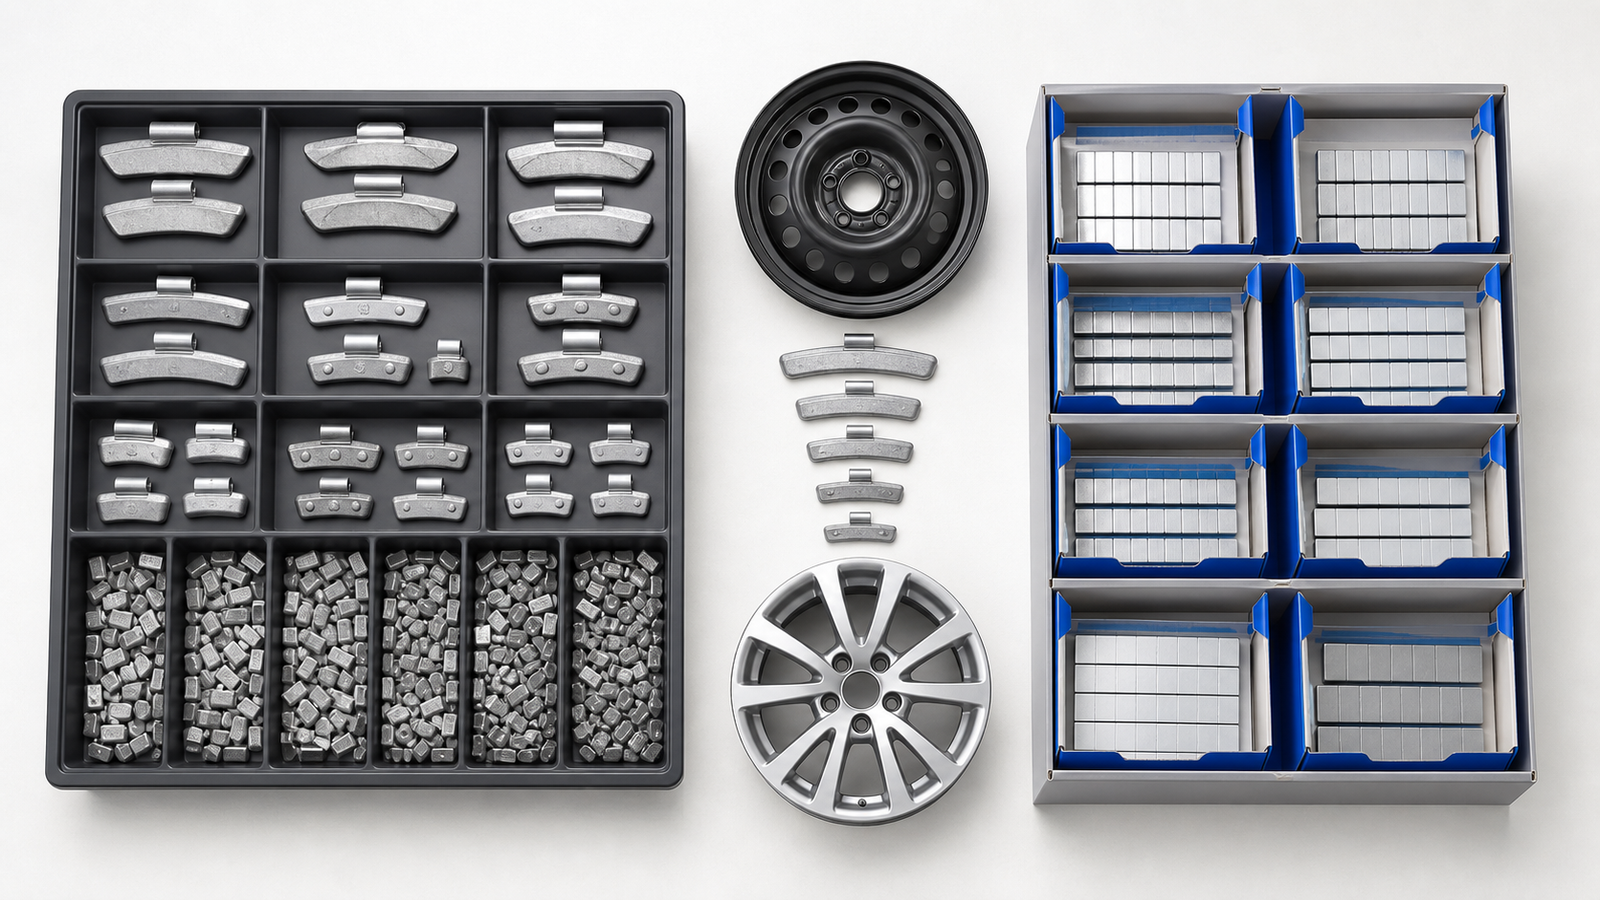
If you are comparing clip-on and adhesive wheel weights for a specific wheel range, share the wheel type, finish, clip profile or clearance, tape requirements, target market, and volume. We can help you compare representative samples before standardizing the range.
Conclusion: Choose the attachment method around the wheel
Clip-on wheel weights are practical when a suitable rim flange, profile, and installation process are already confirmed. Adhesive wheel weights are practical when appearance, inner-barrel placement, clearance, or a delicate finish makes a flange clip less suitable.
The reliable decision is not “clip-on versus adhesive” in the abstract. Identify the wheel, confirm the mounting location, validate the profile or tape conditions, and approve a representative sample. Then define mass increments, material, packaging, and market documents.
If the next step is product selection, review the wheel balancing weights product category after the application requirements are clear. Yirox can then evaluate the requested format, samples, packaging, and batch-consistency requirements around a real wheel-weight program instead of a generic product list.
Frequently Asked Questions
Are adhesive wheel weights better than clip-on weights?
Not universally. Adhesive weights often suit alloy or appearance-sensitive wheels, while clip-on weights often suit wheels with an approved flange and fast service requirements. The wheel interface and approved mounting location should decide.
Are adhesive and stick-on wheel weights the same?
They usually describe the same broad product format: a weight attached with adhesive tape inside the wheel barrel. “Adhesive” is clearer for specifications, while “stick-on” is common workshop language.
Can clip-on weights be used on alloy wheels?
Sometimes, but only when the wheel has an approved clip-on location and the selected profile and coating are suitable. Do not use a generic clip simply because the wheel has a visible flange.
Why do adhesive wheel weights fall off?
Common causes include dust, oil, brake residue, moisture, poor surface preparation, unsuitable application conditions, weak or contaminated tape, and incorrect placement. Packaging and installation instructions matter as much as the metal weight.
Do all steel wheels use the same clip profile?
No. Steel-wheel flanges vary in thickness, contour, coating, and approved mounting location. Use a profile drawing, flange check, and sample fit instead of assuming one P, C, T, or MC profile fits every steel wheel.
What should I send when requesting wheel-weight samples?
Send the wheel type and finish, vehicle application, clip profile or available inner-barrel clearance, preferred material and coating, gram or ounce system, adhesive or retention requirements, packaging needs, destination market, and expected quantity.
References
[1] 3M. (2021). 3M VHB Tape Surface Preparation Technical Bulletin.
[2] United States Environmental Protection Agency. (2015). Best Management Practices for Lead Wheel Weights.
[3] EUR-Lex. (2000). Directive 2000/53/EC on End-of-Life Vehicles.